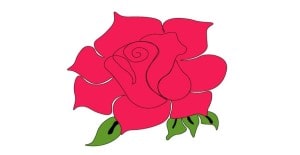
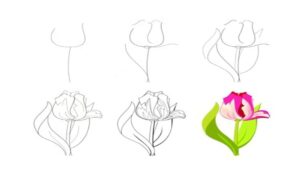
Rose Drawing
I have been thinking about how to make a rose drawing easy for you. Since this spring began, colorful roses have been popping around my garden. I love the fragrance of roses. I have come up with this easy rose drawing. You will learn a simple rose drawing in this tutorial. Before learning how to draw a rose, let’s get some interesting facts about roses.
From making perfumes to using rose petals in bathing water, roses have been used throughout history. There are also 1000 types of roses. Their velvety petals are the symbol of ultimate beauty. Roses with between 25 and 40 petals are considered excellent. These roses are regarded as the most beautiful and visually attractive. Roses with more petals have difficulty blooming consistently and absorbing enough water and nourishment to maintain the flower. Too many petals harm the form of the rose.
These blooms frequently fade quickly or may not fully open. The rose’s outer petals are usually the least appealing to the eye. These petals are known as guard petals because they often turn green or brown and are wrinkled. Guard petals safeguard the flower’s inner petals while it blooms, as well as when it is cut and handled. The guard petals slant outward and fold downward when the rose entirely unfolds, revealing the vivid inner petals. Some florists remove the guard petals to make the blooms look more attractive at first. However, removing these petals is detrimental to the flower’s health. When the guard petals are removed from some flowers, they may not bloom correctly or fully. Roses come in the herbs group due to their properties and applications. Rosewater is used to make so many products.
Art Supplies
These are the art supplies we used. You can find something of your own and make it useful.
- Blank Paper (For Drawing)
- Pencils, Sharpeners, And Erasers
- Pink, Red, and Red Color Pencil
- Red Drawing Marker
- Black Drawing Marker
Learn How to Draw a Rose
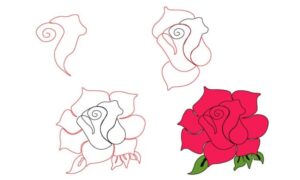
We have included two tutorials for drawing rose. You can follow one after the other and master each drawing easily.
Step by Step Tutorial 1
Step 1:
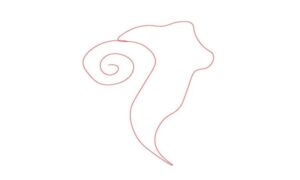
Draw a spiral in the center of the paper with a pencil. Extend it downward in the shape of a curve—figure 1.
Step 2:
Draw a curve from the upper edge of the curve drawn in step 2 and join it below. Draw a curve like this on the left side as well. Both curves will make a U shape bottom after joining below. This makes the inner layers of petals. Then draw two semicircular curves around above and below, keep them pointy as v-shaped in the middle—figure 2.
Step 3:
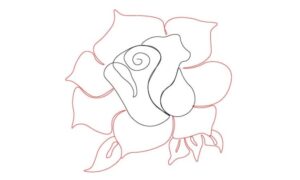
It is time to draw petals and complete the blooming part of the rose. Do it by drawing semicircular curves around each other. Each curve will have a V-shaped edge in the middle. By joining all of these curves, you will see a rose. Draw three semi-v curves joining each other and emerging below the petals on the right side. Draw one semi-v curve on the left side. These four curves will represent the leaves of the rose flower —figure 3.

