
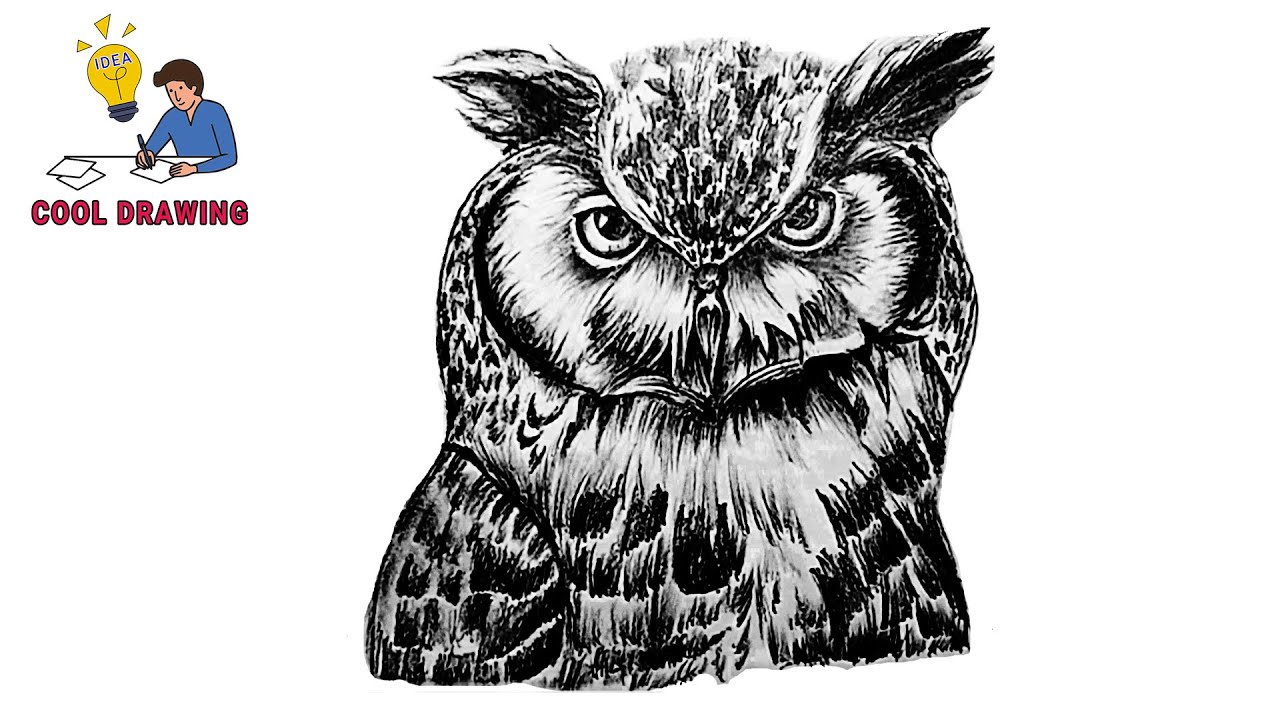
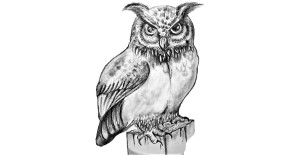
Owl Face Drawing
Here we see Owl Face Drawing Step By Step Tutorial. Owls are popular among children because of their role in different cartoons, books, and movies (such as in the Harry Potter series). Some people are afraid of owls because sometimes they are associated with bad luck. Owls are mostly seen at night on the bark of trees or in the hollow space in the trees, but in a child’s imagination, they can also be seen in the daytime. Picture of owls is primarily used in bookstores, magazines, and classrooms. Do you know why?
Because owls represent reading, wisdom, and drawing, I will make it so easy that anyone can make it, whether a newbie or an expert. Owl face drawing is a good option for anyone fond of bird drawing. It is an excellent option because it has room for detailing. Techniques like different shading and strokes are used to make it more realistic.
Drawing Tools
You don’t need to rush to bookstores to buy the material required to draw this easy owl face drawing because you have almost everything you need at your home.
- Lead pencil (HB, 2B, 6B, and 9B)
- Eraser (rectangular and big so that you can hold easily in hand)
- Sharpener
- Drawing sheet (texture should be smooth for a beginner)
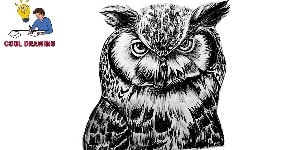
Abstracted images from the above video
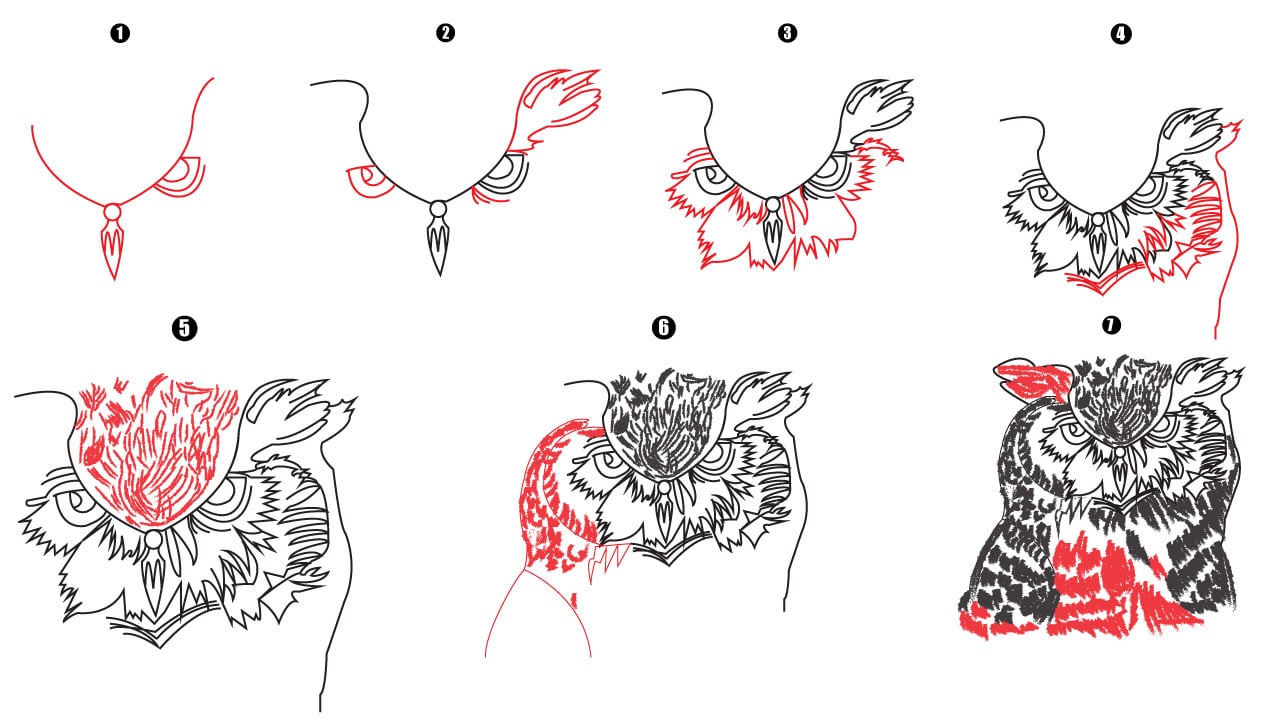
This tutorial will learn how to draw straightforward and realistic owl face drawing using a simple method. Here are some steps to draw the simple owl’s face.
Step1. Eyebrows& nose
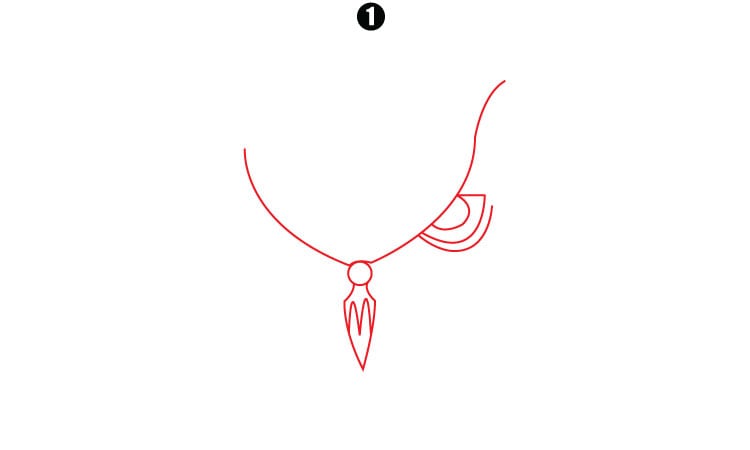
Start drawing by construction lines for the body. Draw around the nose in the middle, then draw eyebrows emerging from the nose. And Draw eyes by finding the midpoint of eyebrows. Draw a solid boundary of eyes with a spot (iris) in the middle of eyes white and give a realistic look to owl face drawing.
Step2. Ears & eye detailing

Then draw horns besides the eyebrows. Add line hatching for shading, and this technique will give a more naturalistic look to owl face drawing. Draw humps in the beak of the owl face drawing.
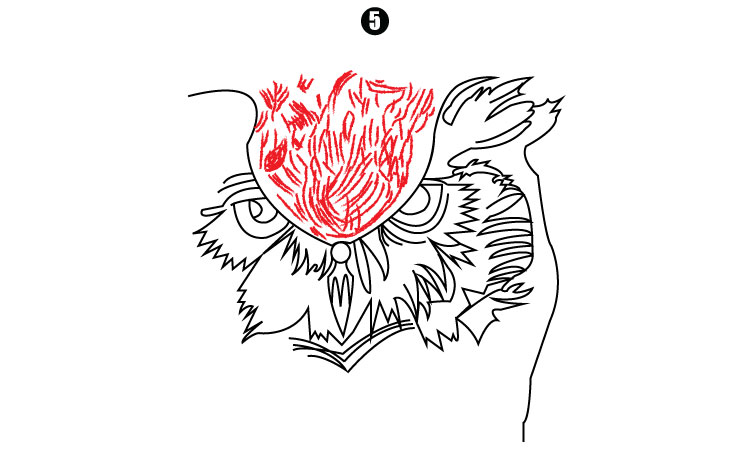
Step3. Feathers near beak for a realistic look

Use the method of cross-hatching for drawing feathers near the beak. Adding more feathers nears the beak area will make it more obvious and give a better look to the drawing.
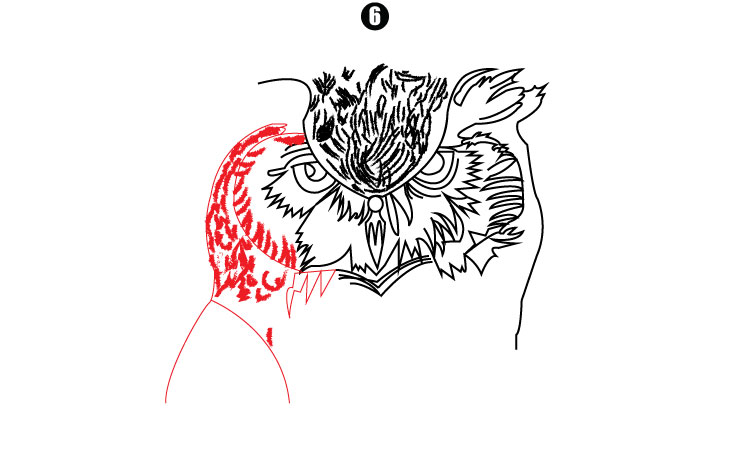
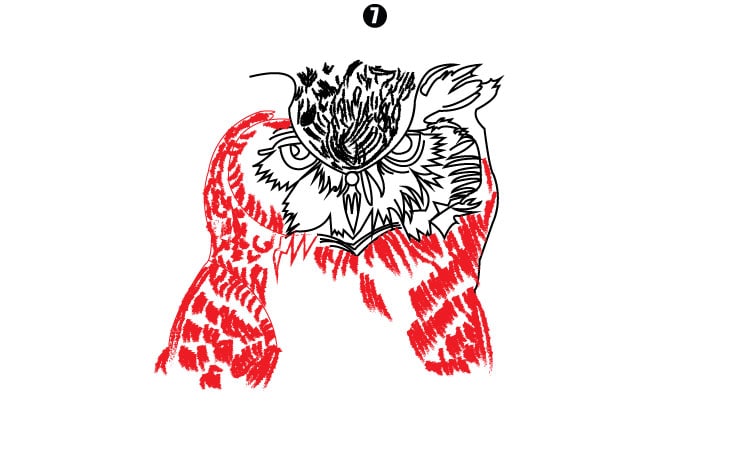
Step4. Defined shape to the body
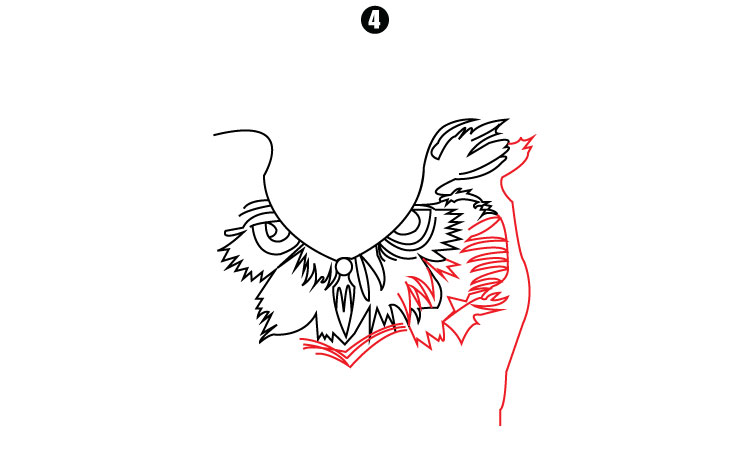
After drawing feathers, now give a solid and defined shape to the owl’s body. Simple owl face drawing must have good shading and a good outline.
