Bike Drawing
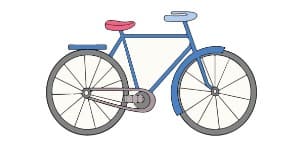
Today we will learn about bike drawing. Cycling is the best exercise to keep fit and healthy and maintain an average weight. Riding a bicycle is an enjoyable exercise. Looking at the shape of the drawing bike seems too tough to draw. But bike drawing is easy and needs excellent attention if someone guides you through some easy steps. Sketching a bike may be complex if you are a beginner. Don’t worry; I will teach you to draw it quickly.
Learn some facts about the Bikes
Riding on a bicycle is a good adventure and cheerfulness. More than 1 billion bicycles are currently being used worldwide. Cycling can save about 238 million gallons of gas every year. The first formed bicycle in Germany. Over 100 million bicycles are prepared every year. Inventors who created bicycles were blacksmiths and Cartwright. The fastest speed of a bicycle is recorded as 133.75km/hr. The popular bicycle BMX was built in 1970. The famous bicycle race in the world is the tour de France. Bicycles were initially known as velocipedes.
5 Useful Tips for Bike drawing easy
A good artist remains very conscious about his drawing. He always wants to create a masterpiece. He takes care of each little thing that can make his work better. So, to become a good artist, you need to be focused and passionate and follow the following tips. These handy tips would be helpful for you for drawing anything, not only bike drawing.
- Be neat and clean
- Avoid erasing again and again
- Relax, don’t hurry up.
- Always adopt a stepwise approach
- Always be creative
Kit for how to draw a bike
It would be satisfactory if you had an inventory of what the bike drawing requires. Since this is a simple drawing, you don’t need many things but only a few basic things.
- Pencils
- Drawing Sheets
- Sharpener
- Eraser
- Colors
- Black marker (not compulsory)
- The time required for the bike to sketch will take only 20 minutes of full attention.
5 Simple Steps for bike drawing
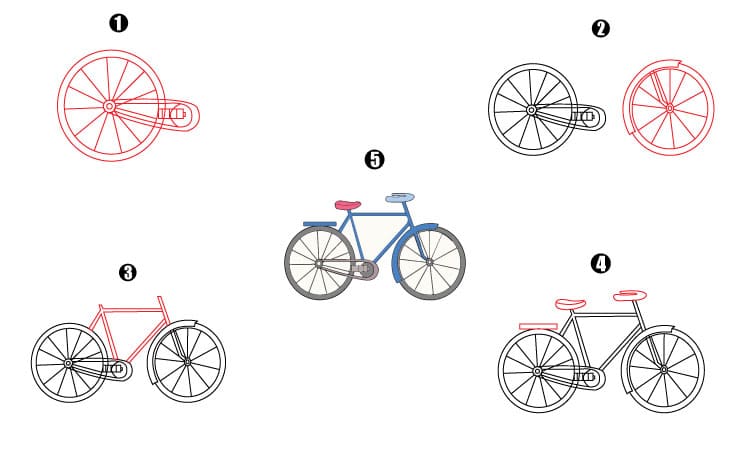
Let’s get started! Drawing bike. So finally, kids, it’s time to draw! I will tell you the simple steps of Athena that you must follow strictly. Here are a few simple steps for your help with drawing.
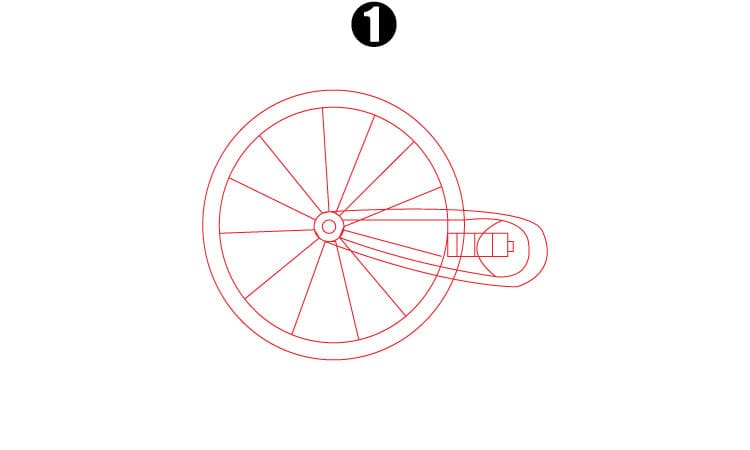
Step 1:
We will begin our bike drawing by sketching a big circle on the left side of the paper sheet. I will recommend using a compass for a perfect circle. Draw another circle inside it with a tiny gap between them. Then we will draw a few lines in the ring to make its wheel cables. Now we will draw the chain by using a few small circles and lines to connect to the paddles.
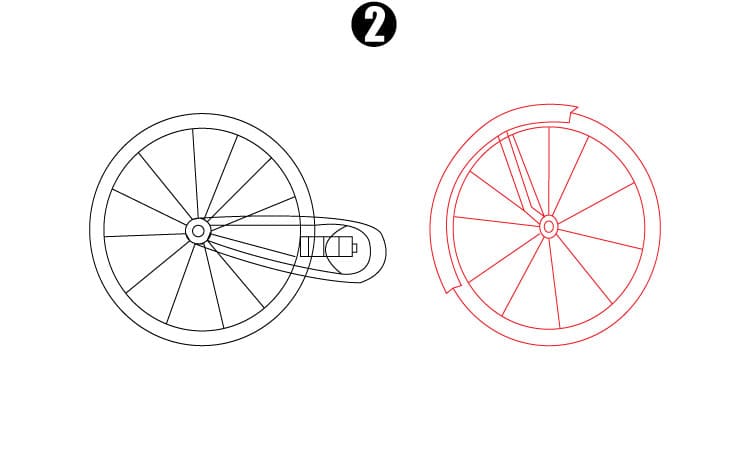
Step 2:
In this 2nd step, we will draw a few pairs of big small circles using a compass, and we will draw a few straight lines inside the circles to make the rim and axle of the bicycle. Using a few curved lines, we will outline the mudguard of a bike.
Step 3:
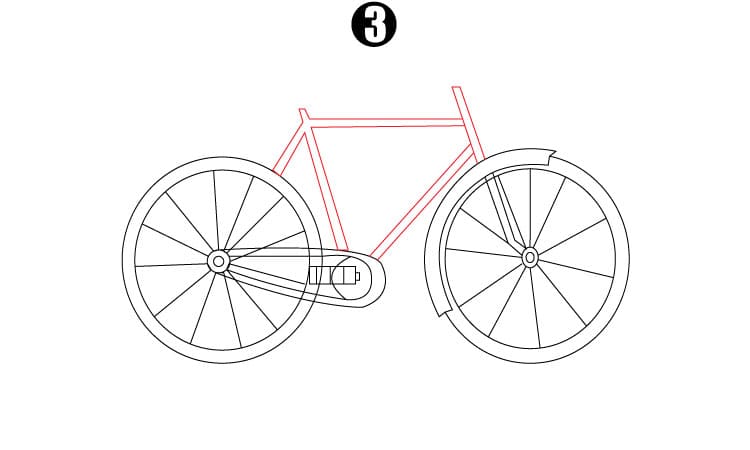
In this 3rd step, we will begin sketching the frame of a bicycle by using a ruler. We will draw two horizontal parallel lines and a few vertical and perpendicular lines to complete the structure. You could use a reference image for further guidance and details if some steps are missed.
Step 4:
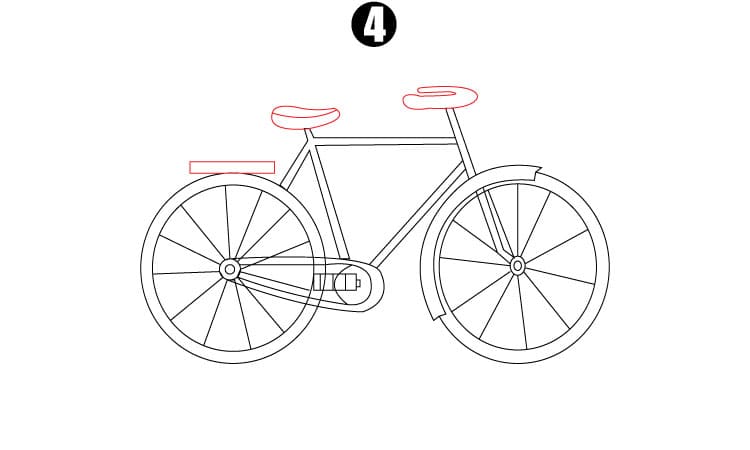
In this step, we will draw the grip and bicycle seat to sit on it. The reference image shows that we can make its handle using a few curve lines and make centers using small rectangular and circular shapes.
Step 5:
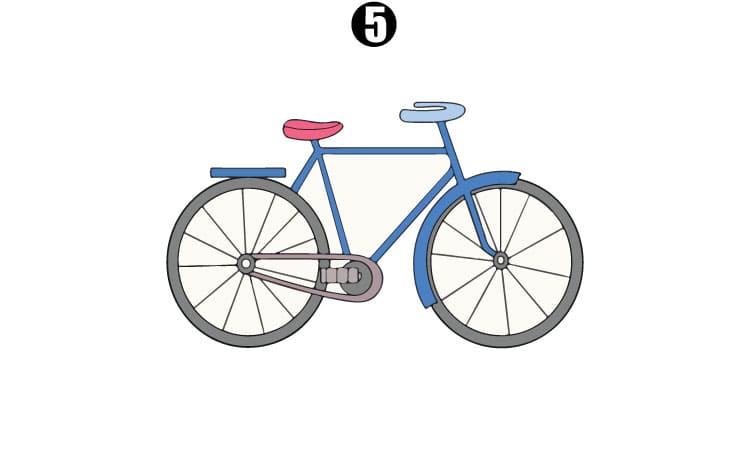
Lastly, our bike drawing is ready to fill in colors. Usually, bikes are available in green, red, blue, black, and white colors. Your kids can use bright and cheerful colors to make this drawing adorable and magnificent to add to their collection book.
Final Words:
So, I hope it was fun for you to go through this guide. Now you are very well aware of the bike drawing. Now it’s entirely up to you how much effort you do into the sheet. Using colors, art mediums, and extra details will enhance your drawing expertise. Drawing is an engaging and quality time-spending activity. So, keep drawing your pages and visiting our website for easy drawing guidelines.
You May Also Like:

