
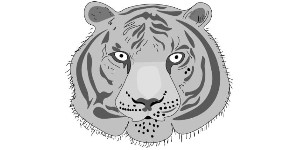
Tiger Face Drawing
For beginners artists, tiger face drawing is always something fascinating. Realistic tiger face drawing from own hands would give anyone the joy of a lifetime. Tiger has a place in animals like no other. The mightiness and powerful roars provide the tiger a place at the top of the food chain. Even high-resolution photos of the tiger’s face are worth watching. If you have tried drawing a tiger’s face and could not satisfy yourself, we have a drawing tutorial for you. This tutorial targets beginners, so you should give it a try. Although tiger face drawing can be complicated, we have made it easier than ever.
Tiger Face Drawing Easy
You can search for tiger face drawing tutorials on the web, but we have come up with a tutorial that will make tiger face drawing easy for you.
Tips for Tiger’s Face drawing
We’ve collected a few good tips and methods for you to apply in your drawing before you start. You can guarantee that your tiger drawing looks realistic by employing the following techniques:
- Take a close look at the rear angle and consider it thoroughly. Your recommendations will assist you in this situation.
- Spend a lot of time with your eyes. Make sure to pay attention to their size, shape, and placement because this will help you portray their intensity.
- It’s important to keep in mind that the stripes aren’t merely straight lines. See how the stripes bend around the tiger’s body in the sample drawings in this tutorial. In your artwork, you should aim to mimic this impression.
Art Supplies for Tiger’s Face Drawing
Here are the art supplies we used in this tutorial:
- 2B, 3B pencils for outline
- 6B pencil for blending
- Sharpie
- Erasers and sharpener
- Drawing chart or sketchbook
Tiger Face Drawing step by step tutorial
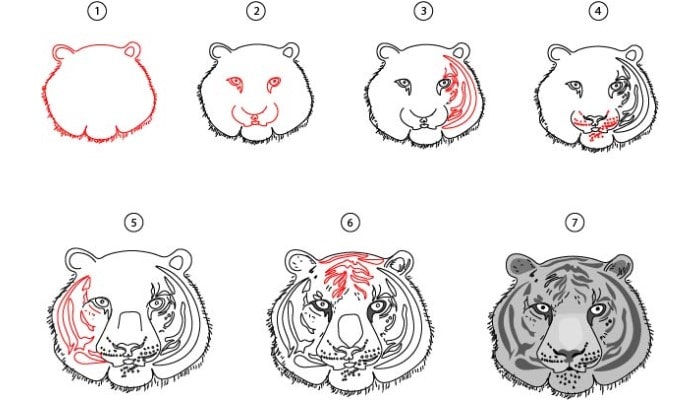
You should also check the video tutorial to understand each step quickly. Here is the step-by-step tutorial of tiger face drawing.
Step 1:
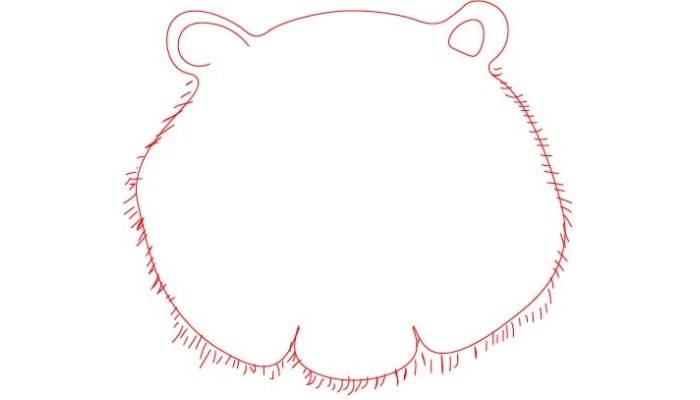
Imagine looking a tiger right in the eyes. Now start by outlining the tiger’s face. Draw the furry face’s outline in an oval shape. Draw two ears on top of the right and left sides and then draw a chin below—figure 1.
Step 2:
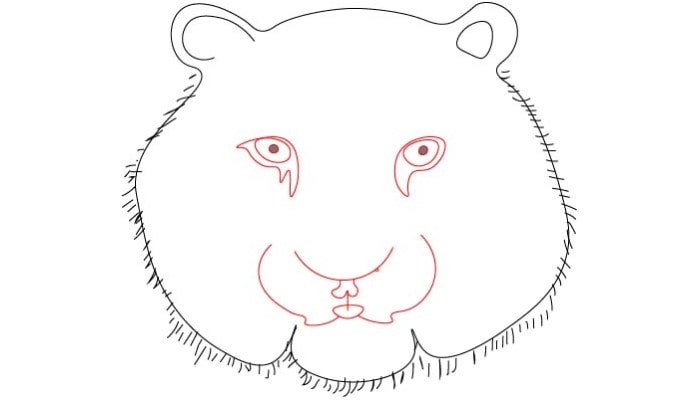
Draw two eyes in long oval shapes, then draw a wide nose and nostrils. Below the nose, draw the closed mouth of the tiger—Figure 2.
Step 3:
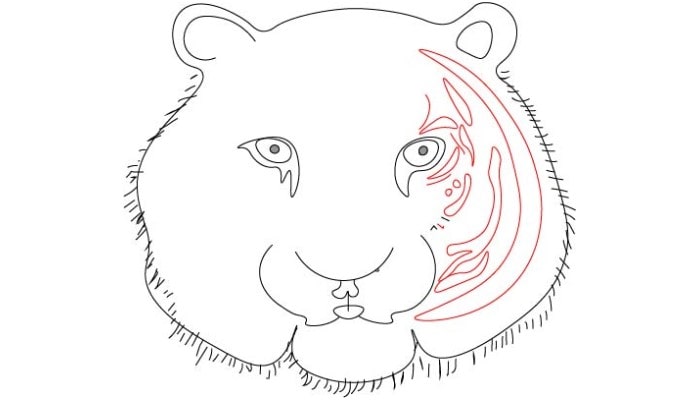
Draw two parallel curves on the right side of the face near the outline. Then draw comparatively small parallel curves near and below the right eye. These curves will represent the black line on the tiger face just like a real tiger—Figure 3.
Step 4:
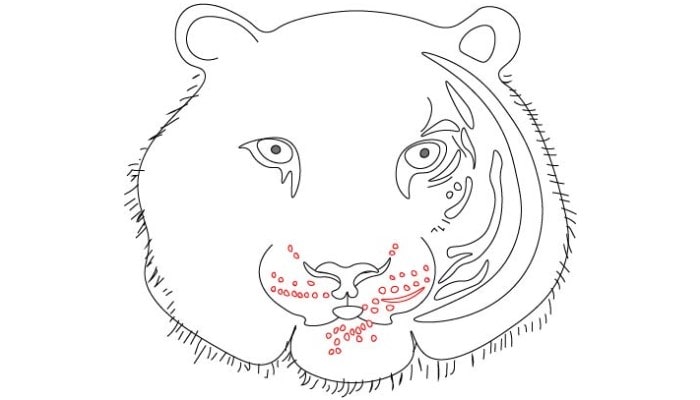
Draw small dots on the mouth below and both sides of the nose—Figure 4.
Step 5:
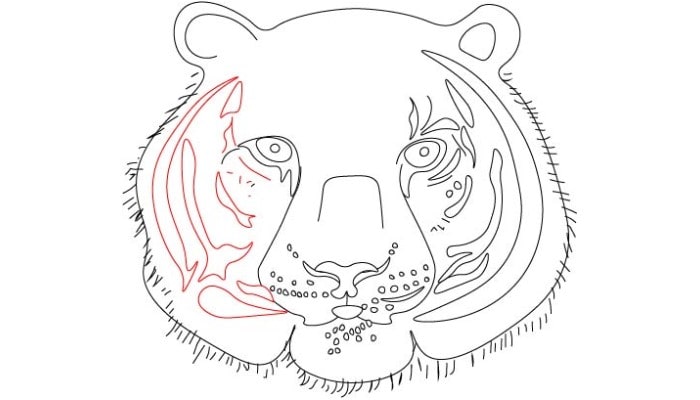
Use the same technique as in step 3 to draw the black lines on the left side of the tiger’s face. Now the black lines on both sides of the face will enhance the textures on the tiger face—Figure 5.
Step 6:
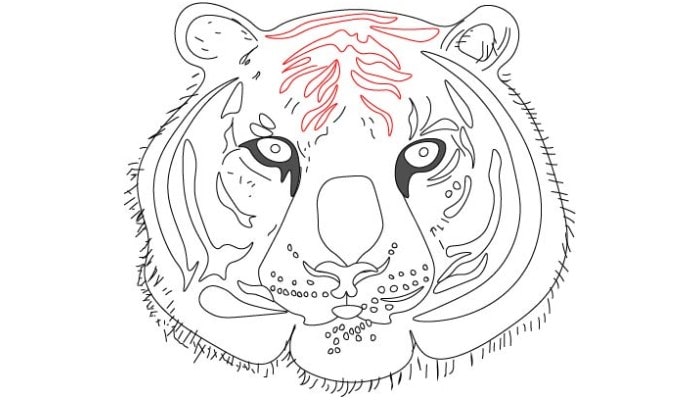
Use the same technique on the rest of the face and forehead to enhance the textures and details—Figure 6.
Step 7:
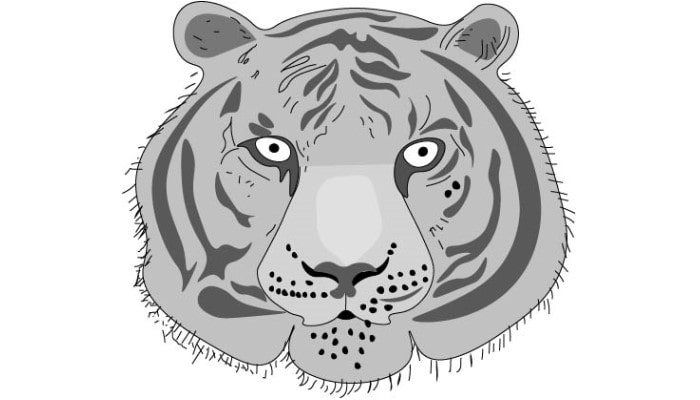
In the final step, it’s time to bring life into the tiger’s face. Use a black color pencil or a 6B pencil to blend in the curvy parallel lines. Put slight pressure while rubbing the pencil to highlight or blend the black strips on the tiger’s face. Then use a sharpie to draw numerous small lines to represent the hair or fur on the face—Figure 7.
There you have a realistic tiger face drawing.
Conclusion
There is no such thing as impossible. It’s all about consistent effort. We are sure that you will perfect your drawing in merely two or three tries. After that, you can try this drawing without a reference, just with your imagination. Please make sure to check other drawing tutorials on our blog.
You may also like:


