
How to Draw Cartoons
There are so many hobbies to spend leisure time. These hobbies permit you to consume healthy time and valuable time. Some include gardening and collecting stamps, and some do coin collections, some like reading books and novels, and some like drawing. Drawing is a creative and economic activity. All you need is paper and paint to complete your picture. Drawing helps you develop your personality. You will have many engaging cartoon drawing ideas on our website.
Our website will keep you busy for a long time to invest your skills in drawing. There are a lot of easy cartoon drawings that will keep you engaged and have a healthy time to feel relaxed. We will provide you with many pretty things that are very simple and easy to draw. You will learn how to draw cartoons character that are all-time famous in history. All you need to collect your drawing kit that will help you make your drawings magnificent and stunning.
Cartoon drawings used to express thoughts
By the way, if you look at the old ages, you come to know that funny and simple drawings were used to express their surroundings. For example, a man with a monkey’s head or a big leaf to cover their body, etc. These funny drawing ideas that are easy were abstracts from real life that provide entertainment in the form of cartoons. Moreover, a cartoon drawing step by step is used to communicate your thoughts. If you articulate your thoughts skillfully through cartoon drawings ideas you become successful in communicating your message to others. And hence this gives you a distinguished place among other average cartoon makers.

Along with the above, cartoon drawings are used to convey serious social issues with a lighter look through cartoon drawings step by step. Therefore, most probably you become interested in taking up cartoon drawing as your profession, too. On this subject, we train you to become an expert in drawing art through our cartoon drawing ideas for beginners. Now, it is up to you to select the reason to learn to draw cartoon drawings. But whatever the reason is, our cartoon drawings step by step tutorials will facilitate you to become a pro.
Benefits of Cartoon Drawings
There are several benefits of drawing for you and your kids. Cartoon drawing is constructive for personal development and positively impacts kids’ health. You must encourage your kids how to draw cartoon activity; that will be very helpful for their unique skill development. Here are a few benefits of cartoon drawings:
- Best leisure time activity
- Improves artistic skills
- Help them focus and improve concentration.
- Sharpens mind
- Improve memory
- Suitable for all ages
- It helps in the identification of colors, shades, and their use.
- Stimulate healthy growth
- Relieves stress
- Improve critical thinking
it will improve problem-solving skills, etc.
Amazing Facts about Cartooning
The topmost amazing fact about cartoons is your cartoon drawing. Whether it is right (similar to original) or not, whether it is good or bad ultimately results in a cartoon character. This shows that you are always successful in drawing cartoons. By the way, this is a source of motivation and encouragement to be successful in drawing something whatever we want to draw.
Sometimes, it is very discouraging for kids and adults as well to draw famous cartoons or cartoons of their choice. Because they are tricky and difficult to draw as it is they are. But, no need to disappoint; we bring drawing ideas that are easy to draw simple drawings of your favorite cartoons. Moreover, we suggest you start with simple drawings of cartoons. Follow above to keep you and your kid’s morale high to keep up with expectations from cartoon drawings.
Therefore, we bring in Manga characters that are pretty simple and easy that boost beginners to draw cartoons. Simple drawing ideas about cartoons are gigantic fun and an excellent start to learning how to draw. Hence, we bring an amazing collection of drawing tutorials for beginners step by step to let you learn to draw manga cartoons. In this regard, we are producing easy drawing tutorials of cartoon drawings that you and your kids can enjoy simultaneously. Moreover, you can learn how to draw cartoon drawings of girls, cartoon drawings of animals, cartoon drawings of people’s faces, etc.
Moreover, how to draw Cinderella, how to draw belle, and how to draw Rapunzel is no more difficult. There are very easy drawing tutorials on how to draw Notaro, and how to draw Captain America available for you. Furthermore, now how to draw sonic, how to draw tom and jerry are at quick access with us.
Tips to Draw Cartoons
Do you want to learn to draw cartoons? If Yes, we bring some basic tips to draw cartoon drawing ideas for beginners. These are also helpful in developing the skill of cartoon drawing in a newbie. We provide you with tips for easy pencil drawings for beginners to facilitate you to become familiar with cartoon drawings.
- At first, you need to have the dedication to become a cartoon artist. With the absence of dedication, it is no more possible to achieve the desired level of expertise in the art of cartoon drawings.
- Second, you can make it more animated and attractive by adding up colors to the pencil drawing ideas of cartoons.
- You can boost your cartoon drawings skill through our drawing tutorials for beginners step by step. And this will improve your skill to learn how to draw Santa Claus, how to draw Goku, and others.
- Third, try to keep away from detailing to avoid the messy look of your simple cartoon drawings.
Without a doubt, above all tips would be of great help to you and your kids simultaneously to learn to draw cartoons. Now, don’t say “No, I can’t” to your kids when they asked you to learn a cartoon drawing from you. Please keep in mind; we have entertained thousands of beginners to start their journey of cartoon drawings. Now it is your turn to start with your creativeness of cartoon drawings with easy drawing tutorials. In this regard, we have a long list of drawing ideas to learn cartoon drawings with entertaining cool drawing ideas. So have a happy journey of how to draw a cartoon!
The material requires how to Draw Cartoons
To start basic cartoon drawing and to learn easy cartoon drawings, you do not need a massive list of expensive things because drawing is suitable for everyone. You can start with whatever you have. The only two essential things are a pencil and a piece of paper. But still, if you need to bring some items, bring the following for your drawings.
- Pencils made of lead,
- A drawing sheet,
- An eraser,
- The sharpener,
- Colors (pencil, marker, watercolor, oil paint, crayon)
- Black drawing marker, etc.
Collection of Cartoon Drawing
Drawing is a joyous and very beneficial activity. If your kid starts drawing earlier, he will be a master in drawing in a few years. All these cartoon drawings will help your kids to learn more about this skill. You can use all of your favorite colors and start drawing with a lead pencil. We have a variety of top cartoons of history to draw because every person has a separate personality and different choices. So, they can choose a favorite cartoon character from here and start drawing it.
Bart Simpsons Drawing
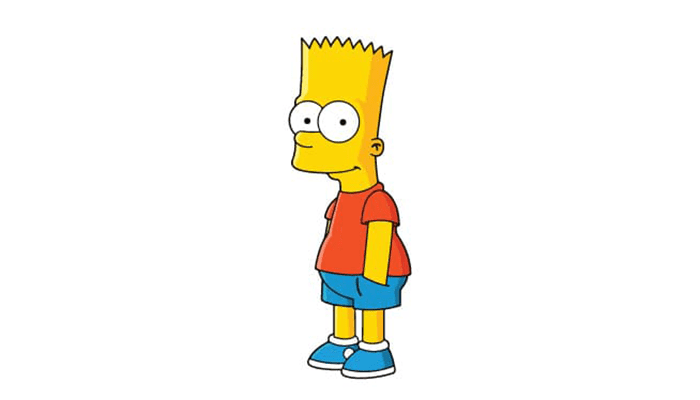
Simpsons is the most popular and longest-running animated series in the history of the U.S. This cartoon family dominated TV for an extended period. The famous member of the family is the oldest son, Bart Simpsons. The Simpson is a parody of a non-functional American family. A fictional town called Springfield is the setting for the show, which often shows pop culture and social and political commentary. This naughty boy is always ready to make humorous comments on different social, political, and cultural issues. It is also fun to learn how to draw Bart Simpson because of his distinctive look. Are you curious about how to draw cartoon Bart Simpsons?
We will begin to draw Bart Simpson from his head. We will draw a pair of vertical lines to draw the sides of his head. Then connect the zigzag lines to the vertical lines for his spiky hairs. To illustrate the bottom of the face, draw a curve line. Using a pencil, sketch the base of Bart’s face. A curved line should be inserted along one side of the head, looping around beneath the shape to form the upper lip.
Create the mouth and neck by drawing a curve beneath it. For the ears, draw a “C” shape. Add more curved lines to the inside. To complete the neck, use a short-curved line. Now we will draw his round eyes by sketching big circles, using a curve line to draw his nose from the pupil. Then draw the lower body of Bart Simpsons. Connect neck sides with curved lines and use curve lines to form his shirt sleeves. Draw some curved lines reaching down from the neck to the belly. His belly will then be created by ballooning out these lines. In the end, draw his legs and arms.
Batman Drawing
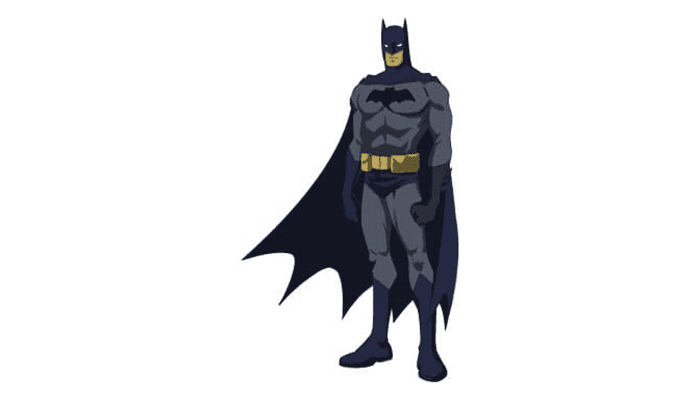
There are so many famous superheroes with unbelievable and stunning powers. Batman is one among them. He uses his wisdom, intelligence, and nifty gadgets to protect the gothic city of Gotham. You can call him the knight of the caped crusader; this superhero has won the hearts of many people worldwide. It is a comic series, and the character of Batman is created by artist Bob Kane and writer Bill finger. Are you curious about how to draw a cartoon, Batman? Batman is easy to draw. We will begin with Batman drawing from his face. We will use a curve draw to outline his head and pointed ear. Now draw his round forehead and a square chin. Draw an M-shaped opening around the mouth of a batman. Draw his triangular eyes and his mouth.
Then draw his triangular ears and sketch a curve line to form a batman’s shoulders, bicep muscles, and fist. Now we will draw his second arm. Draw a band on a batman’s arm with a curve line to indicate his glove top. Now by using overlapping lines, we will draw the first of a batman. Then use a curved line for sketching Batman’s pectoral muscle. Now complete the outline of a bat using sharp curve lines for the bat’s ears, tail, and wing tip.
Now draw a curve line to sketch a batman’s torso and chest muscles. Now remove a band on the arm to complete the glove and a spike on the back. Now extend the extensive line to outline the leg of a batman, and sketch a few parallel lines across the stomach to make a belt. Now use straight vertical lines and curve lines for Batman’s suit torso. Now draw his legs and then draw the cape and logo on the front of the Batman.
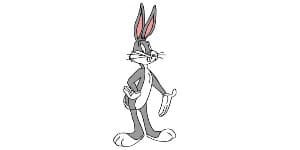
Bugs Bunny Drawing
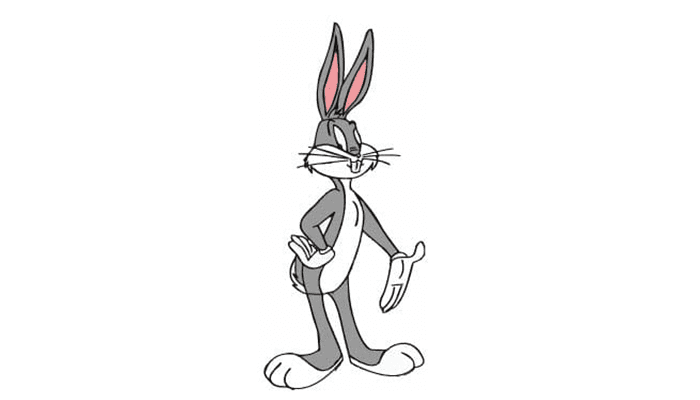
Our following collection in how to draw bugs bunny. Bugs bunny is the most famous and recognizable cartoon character of all time after Disney’s mickey mouse. Bugs bunny is an iconic cartoon the history. He has made many different appearances in almost any form of media imaginable. Learning how to draw Bugs Bunny to recreate this animation icon can also be great. After a century, the bug bunny is still on screen, beautiful, engaging with many positive energies and lessons. Are you curious about how to draw the cartoon Bugs Bunny?
We will begin to draw bugs bunny from his diamond shape head with rounded corners showing his face, cheeks, and chin. Use some short-connected lines to sketch his face and furry appearance. Now draw a long-curved line and double it back to draw the bug’s belly. Outline the chest from short lines and use curve lines to sketch the torso’s neck, arm, and side.
Now draw his legs and extended foot by a long curve line doubling it back. Now draw the curve lines across the top of the foot similarly, and draw the 2nd leg of a bug’s bunny by repeating the same process. Now add the eyes and whisker hairs on the face of a bug’s bunny. Use a few curve lines to make their gaping mouth and teeth of him. In the end, draw the long ears of a bug bunny. Now it is time to color your drawing in unique and cheerful colors.
Daffy Duck Drawing

Daffy duck is another classic and iconic cartoon character of Warner’s brother’s looney tunes. It was introduced in 1930 and is still popular. The naughty cartoon is among the top 50 cartoon characters. Naughty daffy has been featured in many textures and forms of media like tv shows, animated films, video games, and many more. Would you like to create an adventure by learning how to draw a daffy duck?
We will begin drawing a daffy duck by sketching his eyes. We will outline two oval shape eyes for daffy. Then we will draw two small circles to draw his pupils inside eyes inside ovals and a curve line to make the eyebrows of a daffy duck. Draw curve lines of varied sizes to make hairs of daffy ducks. Now use curve lines to draw the beak of a daffy duck.
Then draw the slender neck. Then draw the arm of the daffy duck using curved lines and the other arm and torso. Draw a few curved lines to make the belly of a daffy duck. And now begin daffy led by sketching “l shaped line to make his foot. Use more curved lines to complete the legs and toes. The toes have a “w” shape on the tips. Our daffy duck is ready to fill colors in black and yellow.
Daisy Duck Drawing
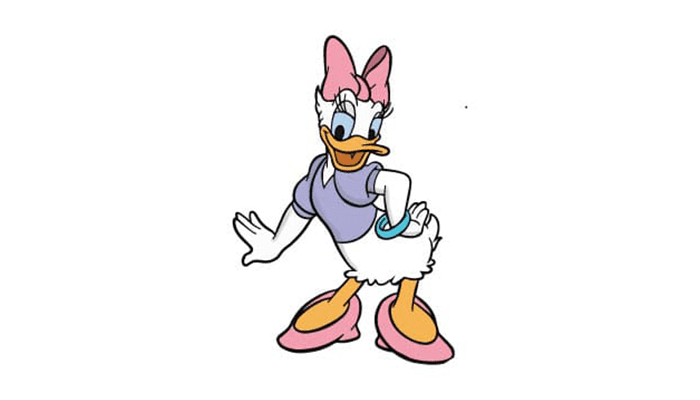
Daisy duck is a famous and iconic character in how to draw cartoons. It is the sensational sixth character of Disney character. This fabulous character appeared in comics in 1940. She is the best friend of Donald Duck and Minnie mouse. She is a loving girlfriend to Donald duck. She is sound manners and with an explosive temper. It appears in many cartoons, tv shows, animated movies, and video games. Are you curious about how to draw the cartoon Daisy Duck?
We begin our daisy duck drawing from her face. First, we will draw two irregular oval shapes to form the eyes of the daisy. Then draw a curved line to make her eyelid and two ovals inside large weird ovals to make pupils. Both pupils are on the same sides of the eyes. Then draws two curve lines to make the eyebrows and a few curved lines to make eyelashes.
Then draw an extending curved line connecting to the eyes and ending in a loose spiral at the end. It will give the top of the beak of a daisy duck. Now draw some overlapping curved lines to the side and tip of the beak. Complete the outline of the beak by using two curved lines. Draw other curve lines to look at her face smiling. Now draw a few feathers at the head of the daisy to the sideways by a series of curved lines in a zigzag manner.
Now draw a bow over the head of a daisy duck. Then draw the arm of the daisy duck using curved lines, and draw the other arm and torso. Draw a few curved lines to make the belly of a daisy duck. Now begin daisy led by sketching an “L” shaped line to make his foot. Use more curved lines to complete the legs and toes. The toes have a round shape on the tips. Our daisy duck drawing is ready. You can use reference images for guidance.
Donald Duck Drawing
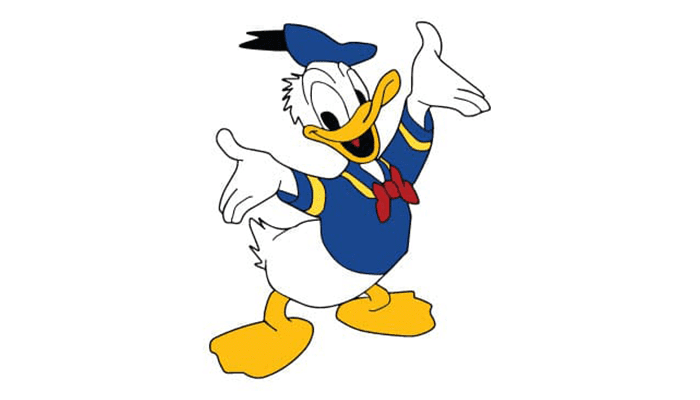
The most favorite and iconic cartoon is still living in our hearts. The naughty Donald has amused many children in their childhood with his silly and proud deeds. This sensational character appeared on the screen in 1934 and is still on the screen. This cartoon is among the top 50 comics. This cartoon wins many hearts and is still the most loving and good family cartoon.
We will begin with Donald duck drawing from his cute naughty face. Begin drawing a big “C” shape to make the head of the Donald duck. Draw a few tufts of Feathers on his head, with curve lines that meet up at a sharp point. Now enclose a round shape using a curve line at the top of the head to form his hat of Donald. Are you curious about how to draw the cartoon Donald Duck?
Then enclose two overlapping lines at the top of the hat. Now draw a pair of curved lines at the back of Donald’s hat and connect it with a small “V” shape for a ribbon. Now draw the beak of a Donald using an irregular “w” shape with rounded corners for the upper portion of a beak. Now sketch a “u” shape to make the lower portion of Donald duck’s beak and smiling mouth.
Then extend a long curve line just below the beak to the backside to make her back, and her belly draws an extended sequence in front that will meet at the tip of the tail with a few zigzag lines. Draw her arms and hands and at the end, draw his flat webbed feet with an “L” shape to make the foot on both sides. The tips of the feet are a little bit curvy and protruding out. In the end, draw the bow of the Donald duck. Take guidance from a reference image.
Garfield Drawing
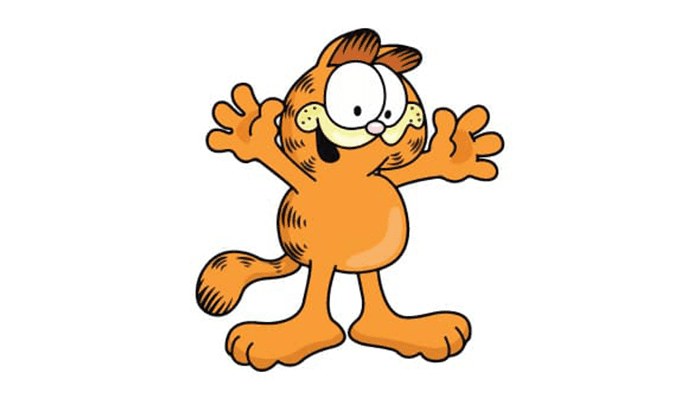
Garfield The most famous cat of comic cartoons, this mocking cat, lasagna-loving cat, appeared first in newspapers in 1978 and is still a favorite, lazy, and sparking character. Garfield is a sluggish pet and likes to sleep and eat, especially loves to eat lasagna. He loves his teddy bear pooky very much. Garfield was born in an Italian hotel, where he developed his love for lasagna. This character still enjoys the spotlight as a star in tv shows, comic films, books, video games, and as toys for kids. Are you curious about how to draw cartoons, Garfield?
We will begin with Garfield drawing from his face. We will draw his small oval nose; along the nose, we will sketch an extending curved line that ends in a spiral—this form Garfield’s mouth along his cheeks. Then draw two partial ovals above the nose and curve lines in the middle of the ovals to make eyelids. Now draw two small circles inside the ovals to form pupils.
Now enclose the mouth by using two curved lines. Make the cheeks look textured by adding dimples and whiskers – small “U” shaped lines at the corners of the mouth form the dimples, and dots form the whiskers’ base. Using long curved lines, outline the sides of the face. Now we will draw her ear using overlapping curved lines from round triangles. Then add other curved lines in the ear to make it more transparent. Draw the tufts of hair under the ears.
Now outline the chin with a short curve line. Then outline her round body with curved lines to form a belly. Sketch the arm using some straight lines. Now draw overlapping curved lines to draw her hand and fingers. Repeat the process to the other side to form the other arm and hand. Lastly, extend two parallel lines downwards from the torso to include her legs. Now using overlapping curved lines, we can draw her foot. Duplicate the procedure for the different sides as well. Our drawing is complete and ready to fill in colors. You can use reference images for guidance.
Goofy Drawing
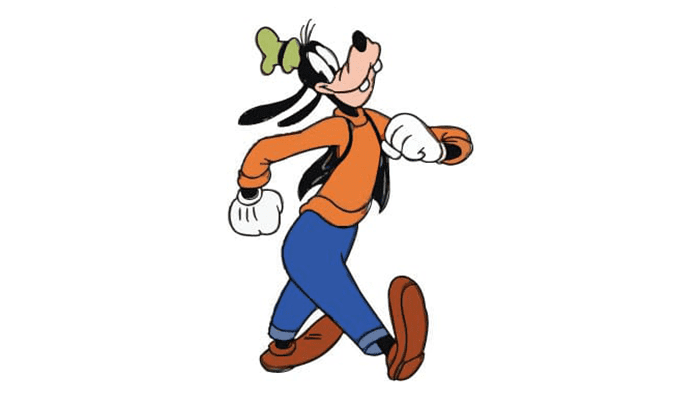
Goofy is a Classic character andromorphic dog, the friend of Donald Duck and Mickey Mouse. Goofy made his entrance in mickey reviews in 1932 and is still famous. He is a good-natured dog but awkward and accident-prone, so he is named goofy. Did you know the original name of goofy dippy dawg?
He was included in one animation series and got immensely popular in 1939, starring a series of goofy dog starts. This character remains in the spotlight of many famous TV Shows, animated movies, film series, etc. I am confident you must be curious about how to draw a classic cartoon goofy.
We will begin goofy drawing from his eyes. We will sketch two oval circles to form his eyes, then two small circles to create his pupils, and then draw a curve line below his eyes. Now we will draw an elliptical circle to form his nose and a small circle inside it to form a nose. Now extend a long bend oval shape beneath the eyes to make the muzzle and snout of a goofy dog. Now draw an “M” shape to form the face of goofy, and now draw a parallel ‘M” shape line to the shape of the eyes to outline the head of goofy.
He uses long curve lines extending backward, forming a teardrop body to create his long ears. Now trace two small rounded rectangles underside of muzzle to develop teeth, and a now draw a “U” shaped line beneath them to mouth opening. Now use a long-curved line to make the crushed bottom of the cap. With the use of overlapping curved lines, you can now form the crown of the cap of goofy. Then we will draw his arms using straight lines that bend downwards. Now draw another arm of goofy, sketch his belly, and then draw his legs to complete your drawing. You can use a reference image for guidance if any step is missed. Our drawing is ready to fill in colors to it.
Hello Kitty Drawing
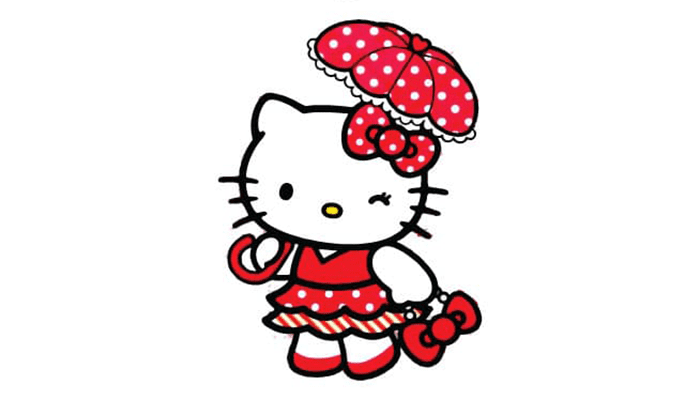
Hello, Kitty is also among the most popular cartoon characters. She is a small, adorable, humble, and innocent cat that gets popular worldwide. From her creation in1974, she becomes a part of fashion accessories, items, toys, balloons, and many more. She is quite a simple and recognizable cartoon character. Hello, Kitty is a star of numerous books, comic stories, two Japanese theme parks, video games, and several animated and live television series. Kitty White is her full name. London-born, she stands five apples tall. Her mother, father, twin sister, and several other adorable characters live in an imaginative world with Hello Kitty. Are you curious about how to draw hello kitty? Let’s get started!
We will begin drawing by sketching a big circle. It will make her round face. Now draw two rounded triangles on her head to make her small cute ears. Erase excessive lines. Draw a circle below the ear and along each circle, enclose some curved lines to form a kitty bow. Now we will draw an enclosed oval shape below the head to downwards with a flattened bottom.
Now draw a small curved line to make the legs of Hello Kitty. Erase extra lines to make it more transparent. Now draw an oval shape with a slight extending curve below the face to form her arm. Repeat the similar process on another side of the arm. Draw a “V” shape to make the neck entrance of the clothes and draw two parallel lines across the body to show the crease of her dress. Now draw a long wavy line to enclose the shape of the kitty’s dress. Then at the end, draw the umbrella of the kitty by using long overlapping curved lines to make an umbrella and a “j” shape to make the umbrella holding stick in the kitty’s hand. You can follow the reference image for any missed step.
How to draw Goku
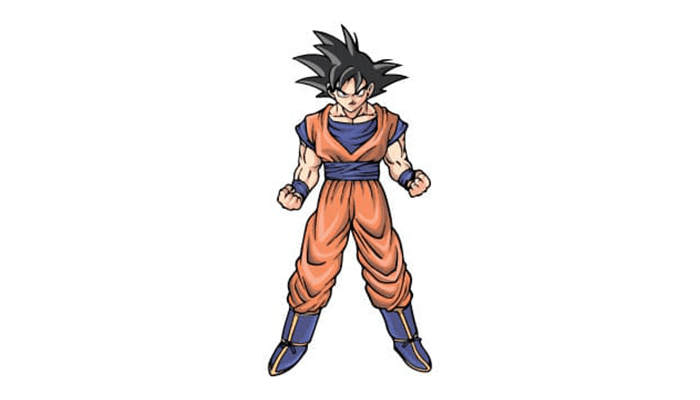
Goku is a famous cartoon character in dragon ball Z and manga cartoon series. Goku always never works on his evil impulses. He was a calm and good student. Listening to his teacher’s words, something negative was growing inside him. He developed some hatred for human beings that he saw as blasphemy. Imagining Goku Black is up to you. An expert in the black Kameyamas, he was able to take flight by manipulating ki. An expert in the black Kameyamas, he was able to take flight by controlling ki. There are several spin-offs and anime shows associated with this action series. Are you curious about how to draw Goku? Let’s get started!
The most distinctive feature of Goku was his dark black spikey hair. We begin with Goku from his hair. We will use slightly curved lines with pointed hair tops for spiky hairs. Then use some rounded lines to form the ears of Goku. Now we will use some straight and curved lines for his eyes and eyebrows and smaller ones for his nose and mouth. Draw two short lies to make the neck of Goku and then draw a circle beneath the ear. Draw a sweeping line pointing downward from the right side of the neck. Make a Y-shape by drawing a shorter line near the top. In this space, draw lightly curved lines to represent the neck muscles. Connect two small hill shapes with a straight line on the left.
Make two diagonal lines pointing downward. Connect three straight lines to the body to form a vaguely looped shape on the right. Complete the sleeve with curved lines. We will draw a diagonal line downwards from the sleeve, move it upward, and draw a few curve lines for his arm muscle. Do repeat the process for another arm. We will outline some slightly curved lines and hill shapes to connect the lines.
Then we draw a sweeping line to make the bottom of the rob. Now to draw a leg, we will make three lopped lines to make his leg and repeat the proper leg process. Draw two oblong circles slightly curved underneath near the ankle for the foot. Our Goku drawing is ready. You can add more details with the guidance of a reference image If any step is missed.
Mario Drawing
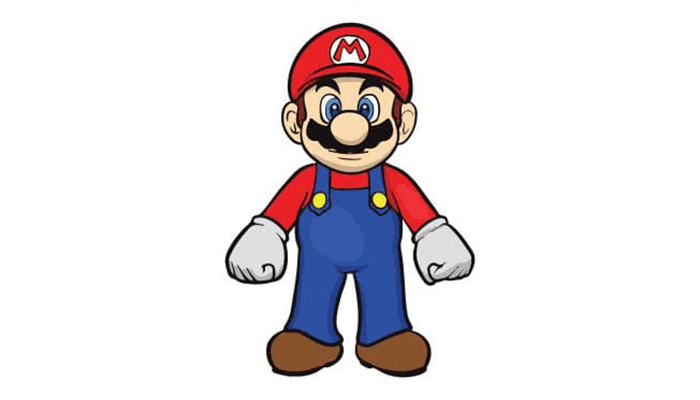
The popularity of video games has only recently increased. Video games are one of the best and biggest entertainment media nowadays worldwide. Because of this recent popularity, few video game characters are considered household names. Mario is one of the characters that are famous with a lot of fans. Each of us played this favorite video game in our lifetime. If you are a fan of this jumping Italian plumber, I will take you to a tutorial about drawing a Mario.
It appears in more than 200 games. Mario is the most successful game franchise ever created by Nintendo corporation. This famous character has been part of many books, television series, films, and toys. Are you willing about how to draw Mario? Let us get started! Begin Mario drawing by outlining his face and jaws with a curved line. Draw a circle in the curved line. It will form Mario’s nose. We will draw a nearly oval curve line to draw Mario’s ears. Then draw two connected curved lines to detail the folds of the ears. Now we will draw his long, extending curved lines along each side of the nose.
We will draw a chisel-like wavy line to make a mustache of Mario. Now draw the curved lines for the head to make his round head. Then we will draw a big circle to make the belly of a Mario. Then draw two sets of slightly parallel lines from the neck to complete the braces of his costume. Now draw two sets of parallel curved lines to form the legs of a Mario. Use two sets of parallel lines from the arms of Mario. Use an oblong oval shape from above and a flattened shape from the downside to making the soul of his feet. Repeat the process for both sides of the feet. Our Mario drawing Is ready to color in cheerful colors.
Minion’s Drawing
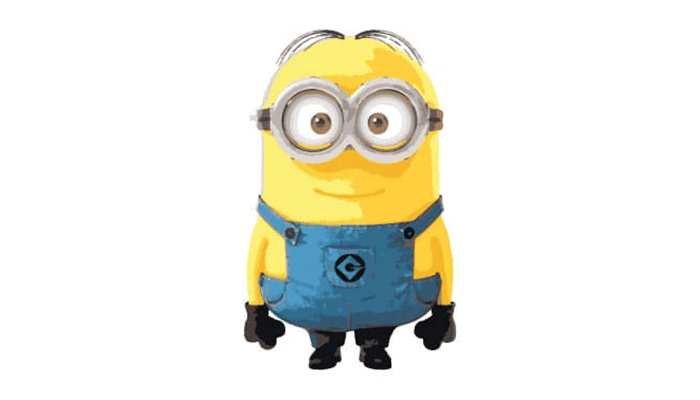
We were the first to introduce ourselves to these childish, cute, odd, incomprehensible, and weird creations of Despicable me in 2013. From their creation until now, they have become part of many games, tv shows, animated films, toys, balloons, and decoration accessories. Minions achieved global popularity due to their childish behaviors and their unintelligible language. These lovably childlike, ignorant, unintelligible, foolish characters are constantly causing fun, chaos, and havoc wherever they go.
There are millions of fans of minions worldwide. You will have incredible fun with these odd, ignorant, unintelligible creations by drawing Minions. The most famous Minon is the childish bob minion. Are you willing about how to draw Minions? Let us get started!
We will begin our minions drawing from his cute face. We draw an oval shape in the middle of the paper and then a big “U” shape that connects to the big circle. Now outline three short curve lines and link them from the bottom, using two slightly curved lines to form his short legs. Then we will draw the feet of a minion.
Extend two curved lines to form the feet using the shapes you created in the last step. Each pair of lines should relate to a curved line. Next, draw a parallel curved line. Using short lines, connect similar lines. Now we will outline the braces of the costume of the bob minion utilizing a pair of parallel lines from each arm to the center of the figure. Draw small circles to make the buttons. Now connect the braces of the minions with a straight line and make it curvy to the sideways of the belly to complete the dress of the minion.
Draw a “U” shape line and enclose it with a straight line to make pockets on minions’ clothing items. Now draw her arms using a pair of parallel lines downwards. Then draw a small circle on their hands to make palms of minions and a “U” shape to form his fingers. Then draw two big circles within a circle to create a gaggle of minions. Draw two small circles inside the goggles and at the end, draw the lip of the minion. You could use a reference image for guidance if any detail is missed. Our minion drawing is ready for cheerful colors.
Patrick Star Drawing
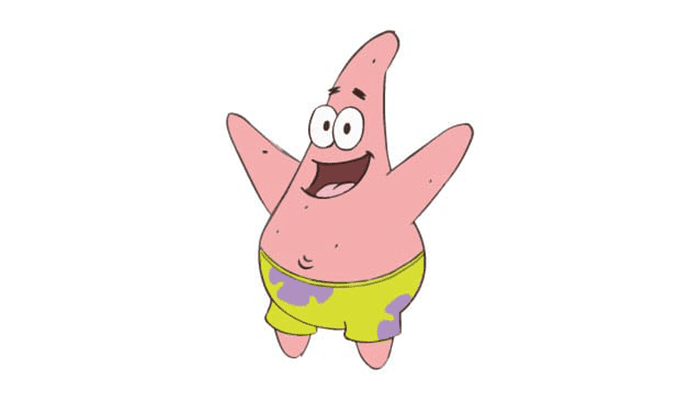
Patrick star is ignorant but the humorous best friend of sponge bob square pants. He is called the “Patrick Smart Pants.” Patrick is a pink starfish and lives about SpongeBob, “who lives in the Pineapple under the sea.” His other neighbor is Squidward, who lives in stone tiki head. Patrick lives under the rock. Patrick gets dumber throughout the series and makes many ridiculous mistakes. Personality, Patrick is idle, stupid, impolite, innocent, and ignorant. Despite as a full-grown adult, Patrick acts very immature, undeveloped, and engaged in many childish activities with SpongeBob. Are you willing about how to draw Patrick’s star? Let us get started!
We will begin our Patrick star drawing from his cute eyes. We will draw two slightly overlapping ovals and then draw a curve line across each eye. Now we will draw two small circles in the eyes to make the pupils of the eyes. Draw “Z” shape eyes brows above each eye. Now draw an elliptical half circle and slightly curved lines to create a happy mouth of Patrick’s.
We will draw an overlapping curved line of different lengths to make the top of the head. We will outline the Overlapping “J” shaped lines and a series of curved lines to make his arms. From the eyes, draw a straight line that moves downwards to the belly portion and becomes curvy at the end to form the torso and abdomen. Then from the right side, we will draw an irregular circle moving downwards to the legs of the Patrick’s.
Then using a series of overlapping curved lines, we will draw his legs. Draw a narrowly space-curved line across the belly to form the waistband. Draw small curve lines to make the belly button. We will draw flower shapes on Patrick’s bikini using a few wavy curve lines. Our Patrick drawing is ready to color. You can use a reference image as guidance for any missed step.
Popeye Drawing
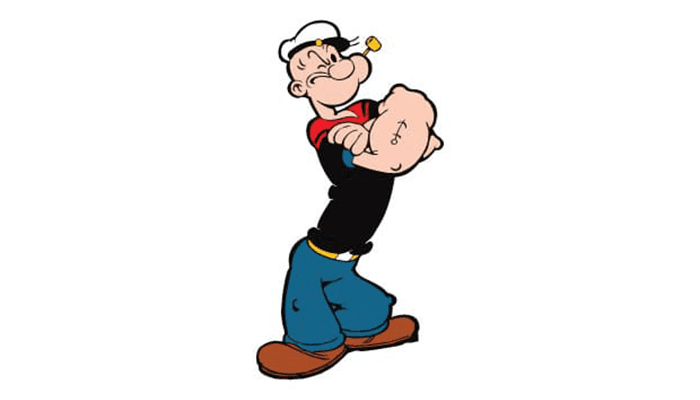
Popeye is a fictional character that appeared in the daily king feature comic strip in 1929. Popeye the sailorman is a combative little sailor with bloated forearms, a partly closed eye (a squinty eye), and a flawed face with an ever-present pipe in his mouth. He is ready for a fight without a reasonable discussion, has a harsh or staid voice, and constantly grunts under his breath.
He gets instant strength from spinach to combat the enemies, which develops the importance of spinach use in children. Popeye has appeared in comic books, television shows, video games, cartoon series, and advertisements for many years. Popeye is still a popular cartoon series. Are you willing about how to draw the cartoon Popeye? Let us get started!
We will begin our Popeye drawing from his mouth. We will draw a tidy circle and then draw two small lines to join the circle. Then we will sketch a few slightly curved lines and an irregular oval to form his nose and draw his inflated cheeks. For that, we will draw a half circle, and then we will draw a short-curved line below the half circle to the straight line of the neck to make his small rounded chin.
Then we will draw his ears by using overlapping curved lines. With the use of curve lines, we will form the cap of the Popeye. We will draw his eyes and the pipe by using small circular lines. Then moving down, we will make his bulging arms. We will use small, overlapping curved lines to make his arm for his bulging arms. Then we will draw his legs. You can use a reference image as guidance for any missed step. Our Popeye drawing is ready for coloring.
Scar Drawing
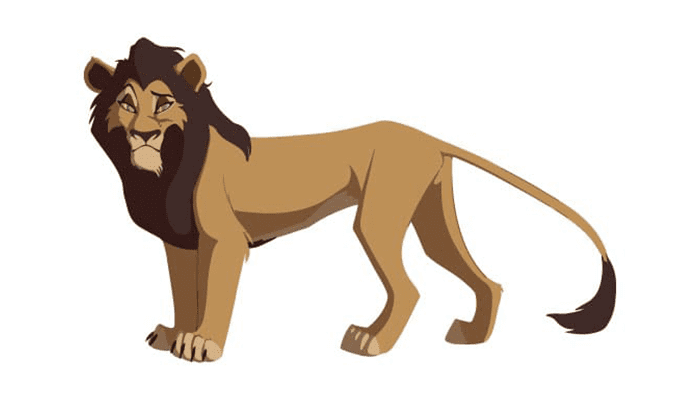
A scar is a primary opponent in the Disney 1994 featured film the lion king. After Mufasa, Scar was the next in line for the throne as king of the Pride Lands. The birth of his nephew, Simba, ended his chances. A jealous Scar, aided by his hyena, devised a murder to take over the kingdom. A scar is the most well-known Disney villain’ character because he was responsible for the murder of Mufasa. Are you willing about how to draw the cartoon villain Scar? Let us get started!
We will begin the drawing of the scar from his head. We will draw a small circle with the help of a compass. Then we will draw a rectangular shape extending from a ring. We use small curved lines within the rectangular to outline the snout, nose, and mouth details. We will draw two small curved lines to form scar ears. Now draw a series of wavy and spiky curved lines to make the mane of the lion.
We will begin just beneath the ear of the lion. Then we will draw a loosely “S’ shaped line to form the mane of lion Scar. Use some curved lines of various lengths over the ear to extend the fur. Then we will enclose the fur from top to bottom by using curved lines to complete the mane of a lion. Now we will draw two circles with the help of a compass to make the belly and the remaining portion of the scarred body. Now connect these circles with small lines from above and down. Erase extra lines from the rectangle we draw for the mouth, snout, and nose and additional lines from the belly portion to form the lion belly. Below the mane, we will extend two parallel lines to include the legs of a lion. Draw the third similar line behind the two bars to make his front legs.
Draw an extending “S” shape line from the stomach area of the lion and extend a series of overlapping “S” shaped lines to form his legs. Now draw his tail using parallel lines and curve lines joined each other to make tufts of hairs on the backside. Now add details using a few small lines to form his whiskers around the snout and mouth. Our scar drawing is ready for coloring. Use a reference image if any step is missed.
Scooby Doo Drawing
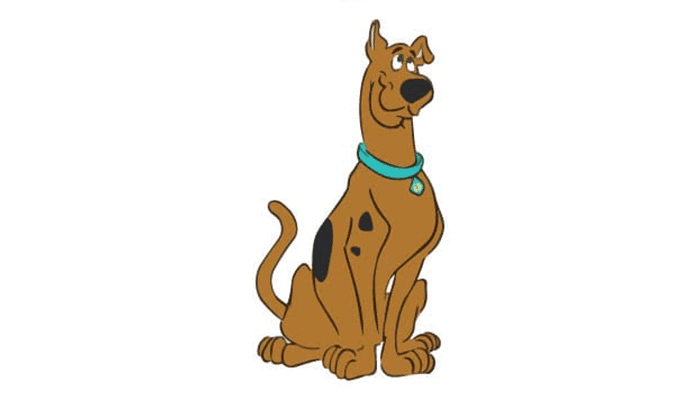
Scooby doo cartoon first appeared on the screens in 1969. It lays the foundations for decades of television shows and movies. The main character was a talking dog, “cowardly and perpetually hungry, greedy but good-natured. Shaggy, Fred, Daphne, and Velma traveled around the country searching for mysteries along with Scooby’s doo. Scooby doo was very delicate, sensitive, and exceedingly ticklish. Shaggy and Scooby fear ghosts and demons despite being part of the Mystery, Inc. crew. Scooby Snacks strengthen their courage. Countless video games, tv shows, and animated movies are based on this famous character. Are you ready for how to draw cartoon Scooby doo? Let us get started!
Start by sketching Scooby’s snout. For the nose, create an inverted triangle, and enclose the upper lip with curved lines. To form the eyes, draw two ovals above the snout. Make a circle inside a circle, and shade between them to create a pupil. It is necessary to draw Scooby’s head. Enclose the gaping mouth, the tongue, and the lower jaw with curved lines. At the corner of the jaw, three lines indicate folds in the skin. Foreheads, ears, and necks should be outlined with curved lines. Create curvy eyebrows and inner ears by enclosing triangular shapes—complete Scooby’s neck with a curve. We should enclose a collar with three curved lines. The name tag is formed by drawing a diamond within a diamond just below the collar. On the tag, outline the letters “SD.”
Now we will use a long curve line to outline Scooby’s back. At the base, outline the hip and legs of scooby doo. Draw an overlapping “S” shaped tail of scooby. Then draw scooby forelegs by using a pair of parallel straight lines and enclosing a foot using “C” shaped lines for toes. Extend a long curve line from collar to forelegs to draw his belly and stomach of Scooby. Now use a curve line to enclose the fore leg of scooby. Using a series of curved lines, we will draw the nearing leg and paw of the scooby. Now add a few big spots on his body. Our scooby drawing is ready to color.
Shrek Drawing

Shrek is an ogre in a movie. Ogre is extremely ugly and man-like in appearance. Their fearsome personality contradicts their kind heart and supporting nature. Shrek lives in a swamp in the fairytale land of Duloc. Anyone who makes him worried frightens him with his fearsome appearance. Shrek is a peaceful, loner, weird, careful, and kindhearted ogre, but he becomes cranky and weird as disturbed by others.
These are the popular character so f folklores and fairytales. It is said that the ogre feed on human flesh. The ogre is based on the mythical creations that devoured humans. This term also applies to those who try to dominate others, like Lord Farquaad. Are you ready to learn how to draw cartoon Shrek? Let us get started! We will begin our ogre drawing from his round face. We will outline a circle with the help of a compass. Extend a pair of parallel lines from the mouth to the right side and enclose it in an oval shape by drawing a small oval inside it to make the antennae-like ears of Shrek. Repeat the same process to another side of the ear.
Then we will draw a big round” U” shaped outline to form the face of the ogre and connect it to his ears, and we will remove the excessive curved line to form his face. Now draw thick lines above the eyes of an ogre to make eyebrows. Use a curve line to outline his big round nose and draw two small circles for nostrils. Using two curved lines, we will outline the eyes of an ogre. Then we will draw a small circle in the eyes of Shrek to indicate pupils. Now draw a curve line up and down to the eyes to form the eyelids.
Now draw his gently smiling mouth and lower lip, side of upper lips using small curved lines. Now using wavy lines, we will enclose the collar of the Shrek. Now we will outline the waistcoat of an ogre by extending curved lines from the shoulders and neck to downwards from each side. Then we will draw his arms and legs. You can use a reference image for further guidance for any missed step. Our Shrek drawing is ready for coloring.
Simba Drawing
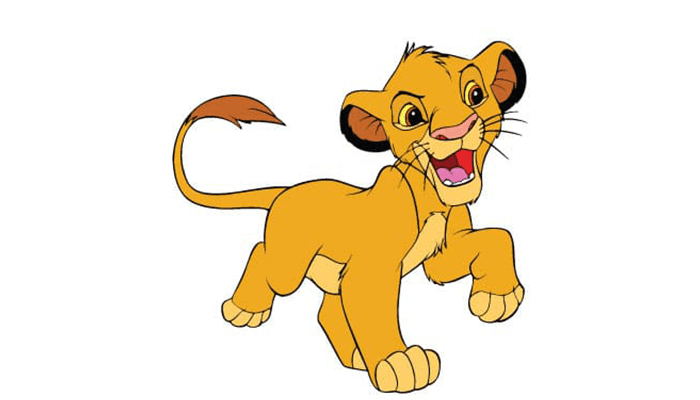
Simba is a lion prince. He is a very daring, curious, and imposing personality. Simba is an epic hero and main character of Disney lion king. Simba means lion in the Swahili language. The main traits of Simba as a hero are his noble birth, he is courage, he is modest, he has extraordinary powers, and he is having some flaws in his personality. Simba also appeared in many television cartoons, like Timon, Pumba, and The Lion Guard. Are you ready to learn how to draw cartoon Simba? Let us get started!
We will begin with Simba from his face. Simba has a pointed forehead. Draw a small curve line for his forehead. Then draw loosely “S” shaped lines that will move downwards from the forehead to the lips. We will sketch a “W” shape for lips that will meet at the irregular lines at the base of the neck. It will provide Simba’s facial appearance. Then we will draw a “C” shape line to draw his ears. Then we will add some irregular inner lines to form his inner ear. Then draw a small rounded shape with wavy lines in the inner ear. Now enclose a round shape on the lower jaw.
Then we will enclose his teeth and use curved lines. We will draw his tongue. Enclose his nose using small curve lines and split the upper lip. Then we will draw the Simba fore legs. We will use some overlapping oval shapes to draw his toes. Then we will draw his legs with long curved lines. We will draw his furry back using curved lines that meet at jagged points. Use a curve line to enclose the belly of Simba.
Use a series of curve lines to draw his back legs and enclose legs by drawing rounded irregular toes Simba. Then we will draw a pair of loosely ‘S” shaped lines to draw his tail and add a tuft of hairs to the tail of Simba. In the end, we will draw the round shape eyes of Simba. Draw an oval shape and then draw some small circles in the oval shape to make the pupils of the Simba. Our Simba drawing is ready for coloring.
Smurf Drawing

Smurf is a comic character that appeared first in 1980 in cartoon series. Smurfs are human-like blue-colored creatures living in a mushroom-like village hidden in the forest. According to the Smurf movie of 2011, they are native to a European country Belgium. The Smurfs are short in gesture, and all the males are bald. They have been trendy in North American Pop culture since 1981. Smurf is a very introverted and sentimental creature. They are the part of Tv shows, animated movies, games, and cartoon series for a long time. Are you ready to learn how to draw cartoon Smurf? Let us get started!
We will begin the Smurf drawing from his nose. The nose of the Smurf is bulging. We will draw an egg-like shape for his nose and then draw two small circles near the nose to draw his eyes. Draw two short curved lines above the eyes to form eyebrows. Then add two tiny circles in the eyes to form pupils. Now draw a small curve line to form the lips and a semi-circle to form his smiling face.
Now enclose some curved lines to form the face outline of Smurf. Then we will draw an extensive “C” shape line to draw his ears and add some more curved lines in the ears. Now, with a circular line, we will form the lower outline of the face. We will now draw the cap of the Smurf. We will begin a curve line from his nose to his head region. Then we will draw a tiny straight line using a long curve line. We will draw his cap. This long curve line starts from the mid of his head and extends to the back of his left ear, forming a cap.
Moving down, we will sketch a pair of parallel lines from his head to form his arms. With the use of overlapping curved lines, we will draw the fingers of Smurf. Repeat the process for the right arm. Then we will sketch a curve line downward from his face to his belly. Then, with some parallel lines, we will draw his short legs. Using overlapping curved lines, draw his feet. Our Smurf drawing is ready for coloring. You could use a reference image as guidance if any step is missed.
Snoopy Drawing
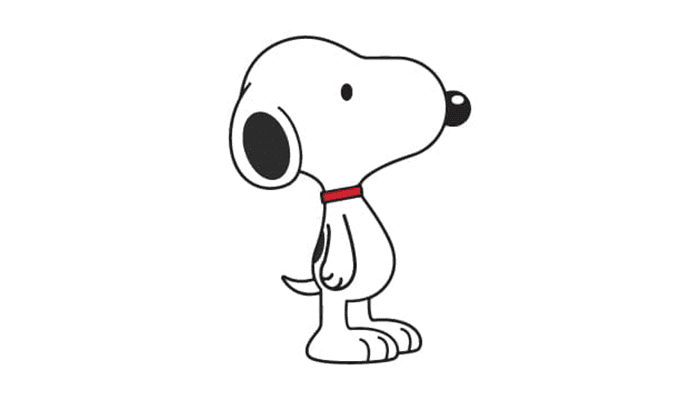
This most beloved cartoon character first appeared in a peanut newspaper comic in 1950. It is a human-like beagle dog species. It is among the most iconic cartoons. He is a sluggish, greedy, and selfish character who sometimes ridicules his owner. But he also shows great love, care, and loyalty to his owner. Snoopy loves to sit on his dog’s house rooftop and likes to nap. He is not an ordinary dog. He is a writer dog and drafts novels that are never published. It has been published in more than 3000different newspapers in 75 countries of the world. Its dialogue has been translated into 21 different languages. It has been featured in numerous animated movies. It is in the 50 greatest cartoons ever. Are you ready to learn how to draw cartoon Snoopy? Let us get started!
We will begin snoopy from his face. We will first draw a big oval. It will give rise to his head. Now extend a curved line beneath his head to enclose an irregular shape. It is narrow at the top to form the neck and broader and flat at the bottom, forming his lower body. We will draw the arm of the snoopy for this. We will draw curved lines from the neck to downwards. Make his finger by using overlapping curved lines. Now moving down, draw his short slender legs of snoopy. Now we will refine the headlines of a snoopy. We are using an oval to draw a long-curved line to detail the shape of his snout. Erase the excessive lines.
Draw a big circle in the ear of a snoopy. Draw a pair of curved parallel lines to form a neckband or collar of snoopy. Using an elongated “u” shape, draw his tail. Now draw small circles for the eyes and nose of a snoopy. Our snoopy drawing is ready for coloring.
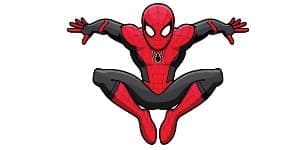
Spiderman Drawing
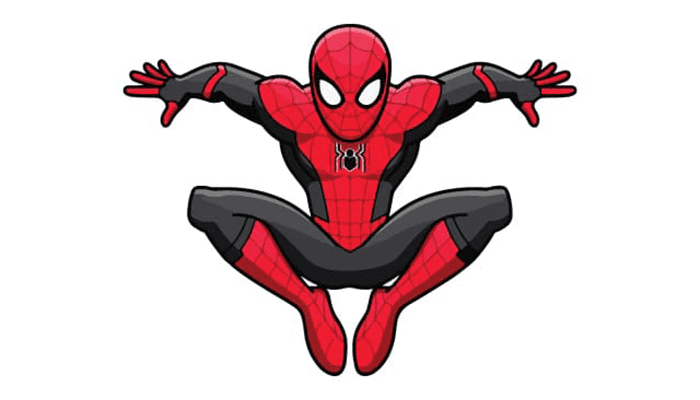
There are so many superheroes with incredible superpowers. There is something fun about imagining what it would be like to have some of these superpowers; Spiderman has the coolest ones. His abilities and awesome costume have earned him a lot of popularity in New York City. Whether you are a spiderman fan or not, you may be interested in spiderman drawing. Are you ready to learn how to draw cartoon Spiderman? Let us get started!
We will begin our Spiderman drawing from his head. For the head, we will draw a small circle. Draw a small curve line below the circle and join it to a circle on both sides to make Spiderman Jaw. Draw another short-curved line to feature his neck. Now extend two short lines from the neck and connect them at the bottom using a curve line. Now use an extended curve line from the side of the neck and connect them using a pair of curved lines. It will give a diamond shape on top of the shoulders. Now, draw some long-curved lines from each side of the shoulder to outline the torso and connect them at the bottom using a short-curved line. Now draw a curve line across the chest. Now we will draw a big “v” shape for his extended legs.
And using pair of curved lines, we will form his legs. We will use two parallel lines to form the legs of a spiderman, and then we will form his feet. We will use a small pair of parallel lines to make the arms of a spiderman. Then by using overlapping curved lines, we will form the fingers of a spiderman. You can use your reference image for guidance if any step is missed. Our spiderman drawing is ready for coloring.
SpongeBob Square Pants Drawing
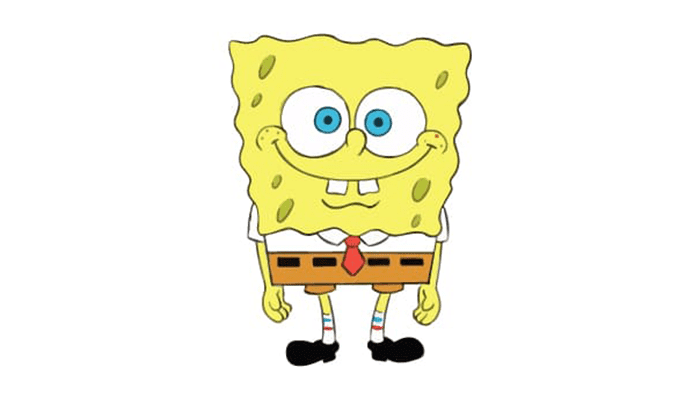
SpongeBob SquarePants first made its appearance on the nickelodeon network in 1999. From then till yet, its popularity among famous cartoon characters never faded. The comprehensive cast of the show’s characters and its comedy have delighted many children and adults for decades. SpongeBob is an ocean-dwelling sponge that is yellow in color and square in shape, like a household cleaning sponge.
SpongeBob lives in a pineapple under the ocean and works at a restaurant called Krusty Krab. His friends include Patrick Star, Sandy the Squirrell, Mr. Krab the squid ward, and enemy planktons. Are you ready to learn how to draw cartoon SpongeBob SquarePants? Let us get started! We will begin our drawing with a square shape. The corners of the square shapes are wavy. The square will form the face of SpongeBob. Now draw a narrow rectangle at the bottom using two straight lines and connect it to the rectangular shape.
Now we will draw a pair of parallel lines to make his arms. The parallel lines are narrow now. Using overlapping curved lines, we will form his hand and palm. At the bottom, we will extend two sets of lines and connect each set using a curved line; from these shapes, we will draw the legs of a SpongeBob. We will draw a pair of straight parallel lines to form his thin, slender, short legs. Now we will draw the SpongeBob shoes. We will use short curve lines and draw an extending outward looping beneath the foot. Then draw a short line to form the front of the heel. Now draw a slightly short curved line and connect it to the shoe front. Now we will draw the tie of SpongeBob. Next, we will draw two big circles to form his eyes.
Now draw a smaller oval in the big circles to form his pupils. We will draw an irregular “U” shape curve between ovals to form his nose. Use an extensive “U” shape line to form his mouth. We will draw a curvy shape for SpongeBob’s smile using two small rectangles. We will form his teeth. Using two smaller curve lines, we form his tongue and draw a few small circles and ovals on his body to decorate it. Our SpongeBob SquarePants drawing is ready for coloring.
SquidWard Drawing
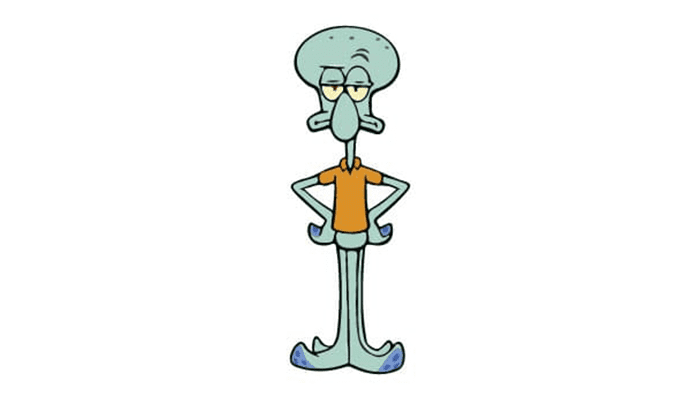
Squidward Q tentacles is a personality in SpongeBob SquarePants. He lives about the SpongeBob in a sunken tiki headstone. He is a supporting character in the animated series SpongeBob SquarePants. He is a cashier at Krusty Krab restaurant and dreams of a life as a Clariant player. He is arrogant, dissatisfied, and bitter towards SpongeBob and Patrick. They overlook his hatred and consider him a friend.
He is remarkably like humans. He is squid-like with six arms instead of 8 arms and two tentacles as squid do and is likelier than the octopus. Are you prepared to learn how to draw squid wards? Let us get started! We will begin our squid ward drawing from his head. We will draw a big “c” shape to form his head. Then we will draw an egg shape beneath the “C” shape. We will enclose an outline using curved lines and irregular shapes on each side. It will form a laughing face and a big nose.
We will draw a curve line inside his mouth to distinguish his lips. Now we will draw an inverted” U” shape line with enclosed ends and a curvy line on both sides to form his eyes and eyelids. Now extend three short lines and connect them to form the squid’s eyes. Draw small circles inside her eyes to form his pupils. Draw a few curvy lines to express furrows on his head. Now we will draw his body. For this, we will start with his arms. Extend a pair of tiny lines to make his neck. Then draw a curved triangle to show his shirt collar. Then sketch a rectangular shape downwards to shape his body.
Now draw a loop of “s” lines to form his curved tentacles and draw a few dots on his palm. Draw some curved lines to form squid teeth and tongue. Now repeat the procedure for his tentacle as described earlier. Now we will draw his lower belly. With the use of curved lines, we will enclose his abdomen. Then we will sketch three curved lines to form his legs. Then enclose the foot with curved lines. Our squid ward Drawing is ready for coloring. Use a reference image for guidance if there is any step missed.
Superman Drawing
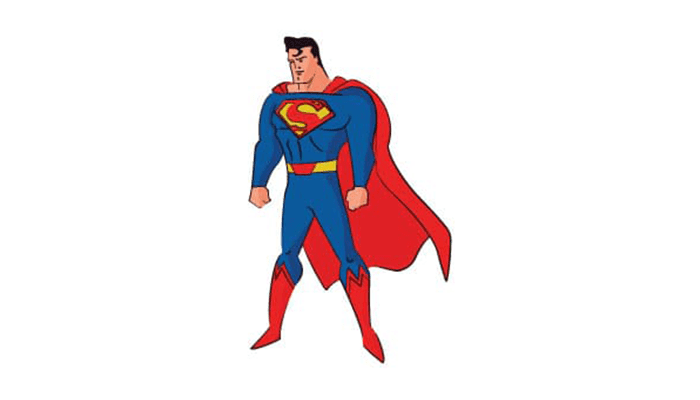
There are so many superheroes with incredible superpowers. There is something fun about imagining what it would be like to have some of these superpowers; Superman has the coolest ones. His abilities and awesome costume have earned him a lot of popularity. Superman, the man of steel, first appeared in comic series in 1938. Since then, an audience of every age has been thrilled by different movies, comics, games, cartoons, and novels.
In comic books, cartoons, video games, novels, and live-action films, Boy scout has used his super strength, speed, flight, x-ray vision, and other powers to save the world. Whether you are a superman fan or not, you may be interested in superman drawing. Are you ready to learn how to draw cartoon Superman? Let us get started! We will begin our Superman drawing from his head. For the head, we will draw a small circle. Draw a small curve line below the circle and join it to a circle on both sides to make Superman Jaw. Draw another short-curved line to feature his neck. Now extend two short lines from the neck and connect them at the bottom using a curve line.
Now use an extended curve line from the side of the neck and connect them using a pair of curved lines. It will give a diamond shape on top of the shoulders. Now, draw some long-curved lines from each side of the shoulder to outline the torso and connect them at the bottom using a short-curved line. Now draw a curve line across the chest. Now we will draw a big “v” shape for his extended legs.
And using pair of parallel lines, we will form his legs. We will use two parallel lines to form the legs of a superman, and then we will form his feet. We will use a small pair of parallel lines to make the arms of a spiderman. Then by using overlapping curved lines, we will form the fingers of a superman. You can use your reference image for guidance if any step is missed. Our superman drawing is ready for coloring.
Tigger Drawing
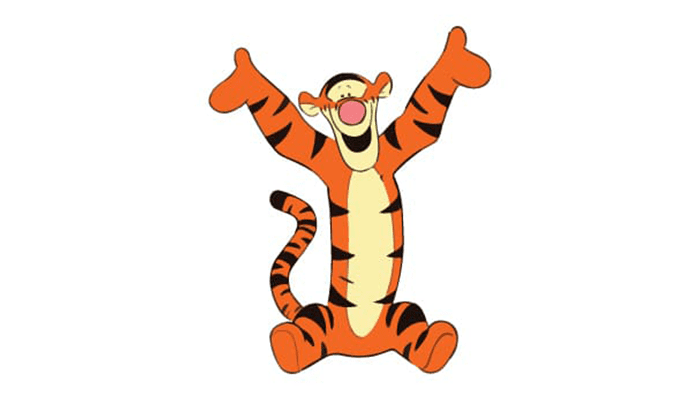
Winnie the pooh is a famous cartoon series. Due to its famous avatars, it is the most beloved one. Perhaps the critical role and perfect cast of all lovable characters suit every personality. Tigger is Pooh’s best friend, and he is always an optimistic, cheerful, bubbly, and energetic character. That is why he is the most popular character and is loved by millions of fans. If you love this stripy stuffed Tigger, you will have an excellent time drawing. Are you willing to know how to draw a Tigger? Let us get started!
We will begin our Tigger drawing from his head. For this, we will draw a small curve line at the top of the page. Then we will connect this small curve line to the big “C” shape lines we draw on both sides of his head to form his ears. Then we will draw an extensive “U” shape line that begins from the corners of each ear to downwards, giving us the face of this Tigger.
Then enclose a series of irregular shapes we will form his snout and mouth. Now we will add some details to his face by using small circles to make his eyes and using some curve lines to form his whiskers. Make several small, arched triangles across Tigger’s face, starting at the top of his head and ending at the base of his jaw. Shape the triangles into strips by shading them.
Outline the outstretched arm and hand with long, curved lines. Short, curved lines define the hand. Then, using a series of curved lines, we will enclose the remaining arm and hand. Now extend a curve line below the arm to form the belly and back. Then we will extend that line to his leg and his foot. We will draw curvy lines to make his legs and foot. Then by using a narrow “S” shape line, we will draw his long tail. Then drew small triangles and rectangles to form over various places of their body to make his stripy appearance. Our Tigger drawing is ready to color. You can use a reference image as guidance if any step is missed.
Tinker Bell Drawing


Tinkerbell is one of the iconic fairies of pixie in fiction. The story of Tinker Bell first appeared in the 1904 children’s book Peter Pan, in which children find a land where they won’t have to grow up. The children could fly thanks to Tinker Bell’s “pixie dust.” It became a classic Disney animated film in 1953. She has appeared in books, movies, cartoon series, and merchandise. She shares the Disney mascot role with Mickey Mouse. Are you keen to discover how to draw a tinker bell? Let us get started!
We will begin our tinker bell drawing from her famous hairstyle. For this, we will start our drawing by drawing a few curved lines connecting each other for her hairstyle that will go to her face. Replicate these lines using curved lines, and then draw a narrow string tying her hairs at the top. To make a loop of string, use some curved lines. Next, we will draw her ponytail by using curvy lines. Now we will draw her face. Draw her eyes with two ovals and circular shapes inside them, and we will draw her eyelashes and eyebrows above the eyes.
We will finish her body for that; we will start with her arms. We will use a few simple lines to make her face and nose. Add a facial outline with some rounded lines. We will extend her arm from the base of her neck by using parallel, slightly curved lines that will end at her hand. Now, with some curvy rounded lines, we will draw her complete body. Now we will add wings to this cute fairy. Our tinker bell drawing is ready for coloring. You can use a reference image as guidance if any step is missed.
Tom and Jerry Drawing
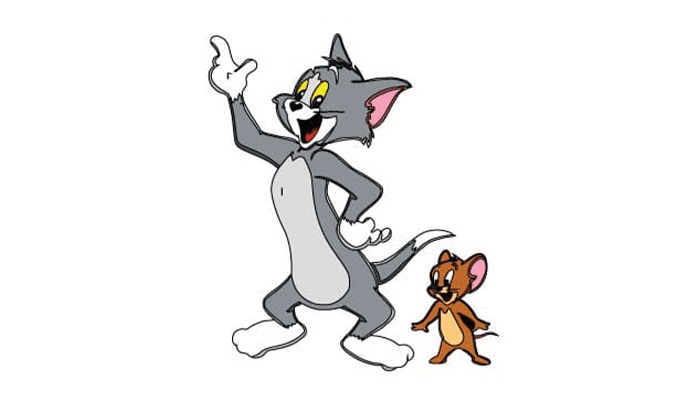
In nature, some animals don’t get along. The dynamic between cats and mice is one of the most famous. Cartoons feature the names “Tom” for cat and “Jerry” for a cute, mischievous mouse. It is a race and competition between tom and jerry captured in the classic Tom and Jerry cartoons. This cartoon appears in the public 1940s, so that’s 82 successful years of their foolish mischievousness.
It’s time to celebrate these two characters that can’t get along. All your favorite Tom and Jerry characters are here for you to draw, and there is so much fun. Almost 200 short toms and jerry cartoons win many academy awards. They are the stars of numerous cartoon series, films, video games, comic books, etc. Are you ready to learn to draw a cartoon, Tom and Jerry? Let us get started!
We will begin our tom face. We will use some curve lines to draw her face, chin, and forehead. Use some overlapping lines that will meet at jagged points to make her tufts of hairs. Then using a “u” shape line, we will draw his lower jaw. Now enclose a peanut shape above the “u” shape. Then enclose the nose using a peanut shape. Next, we will draw tom’s pointed ears. Now sketch some curved line downwards from tom neck to his stomach to form her body. Now using some curved lines, we will make arms. Then moving down using a pair of parallel lines, we will form legs with flattened feet of tom. Using some narrow overlapping curved lines, we will create tom’s tail.
Now we will begin drawing jerry mouse. For this, start using curved lines to make his face, then draw ovals with some small circular shapes inside them to make the pupils of jerry’s eyes. Then using a “u” shape line, we will form his mouth and lips. Then we will move down using a few curved lines. We will sketch his short body. Then we use rounded, parallel lines to draw her short arms. We are using a “U” shape line draw belly of a jerry mouse. Then moving down, we will use parallel lines to form jerry’s legs. Our cute tom and jerry drawing is ready for coloring. You can use reference images as guidance.
Tweety Bird Drawing
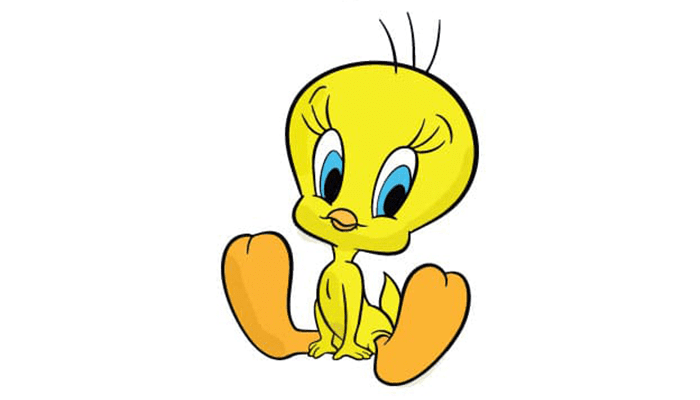
Tweety is the iconic cartoon character of looney tunes and merry melodies of cartoon series. From his appearance in 1941 till yet, he has been a star. This cartoon character has won many significant awards, like an Academy award in 1947. You can find Tweety on many merchandising items like school supplies, T-shirts, watches, jewelry, and home décor items.
Tweety Bird’s original name was Orson. Granny owned him, along with her bulldog, Hector or Spike. Seeing Tweety in a tree as a wild bird was no longer possible. The cat Sylvester often attempts to eat Tweety, a tiny bird. Are you ready to learn how to draw a cartoon Tweety? Let us get started!
We will begin our tweety drawing from his head. We will draw a long-curved line for his head and small curve lines for his cheeks and neck. Then we will sketch a tweety teardrop shape body with an opening at the bottom. We then use loosely “M” shaped lines to form twenty feet.
Then using a pair of parallel curved lines, we will draw Tweety’s arm, and using narrow “U” shaped lines, we will draw his fingers. Repeat the process for another component. Now use two small curve lines to enclose the tweety tail. Now we will draw the eyes of the bird. For this, we will draw two short horizontal lines in the middle of the face.
Now draw inverted “U” lines on both short horizontal lines to enclose the eyes. Draw short curved lines on the eyes to form eyelashes. Use some curve lines above the eyes to create his eyebrows. Now draw some small circles with the eyes to form his pupils. Use double-pointed curved lines to form his beak. Now our Tweety bird drawing is ready for coloring. You can use a reference image as a source of guidance for any missed details.
Winnie the Pooh Drawing
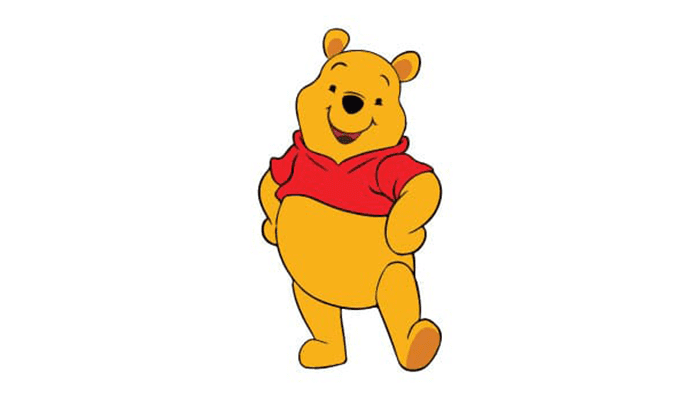
Winnie the pooh is a fictional character. Winnie the Pooh, or simply the pooh, is a humanlike bear living in a forest of about 100 acres of wood. He enjoys fun and experiences different feats with his animal friends, Eeyore, Piglet, and Owl. The character of Winnie the Pooh was created in 1926 in a book and later appeared in a Disney animated movie in 1965.
But until now, Winnie the Pooh is still considered an iconic cartoon character, and people of all ages love this character. His famous pooh bear remains a star in many comic books, films, animated movies, television shows, promotional tools, and school supplies. Christopher Robin, a child, is also a friend of Winnie the Pooh. Are you ready to learn how to draw a cartoon Winnie the Pooh? Let us get started!
We will begin our Winnie the Pooh drawing from his head. For this, we will draw a circle with the help of a compass. Then draw a line from the side of a circle and curve it irregularly and connect it to the opposite side of a circle. It will help you to form the face of Winnie the Pooh. Then draw a long curve line and double it back to develop his body.
Then we will draw his legs with the help of pair of curved lines. To form his foot, we will draw a curved line and allow it back to meet at the bottom of the other line for the top shape of the foot. Now erase excessive lines from his face region. Then, using some curved lines, we will enclose his collar and some more curved lines to form his sleeves.
Finally, draw the bottom of the shirt using a curved line. Then we will remove his arms. Using some curved lines, we will enclose ears. Then we will draw a small circle to make his eyes and short curved lines form his eyebrows. Using a small “U” shape line, we will draw his happy face and some curved line to form his tongue. Our Winnie the Pooh drawing is ready for coloring. You can use reference images as guidance for any missed step.
Woody Drawing
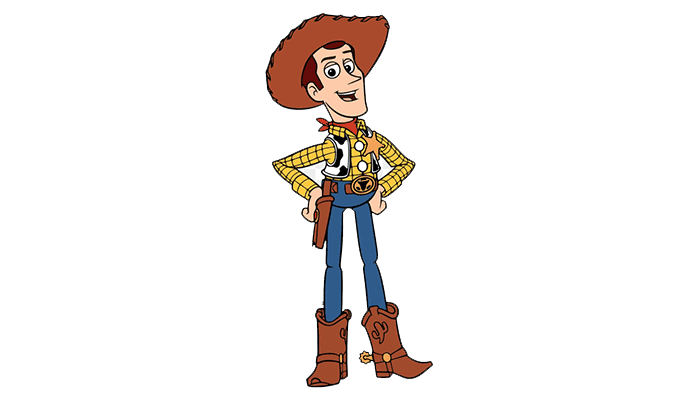
Woody is an iconic character in the Toy Story of Disney and Pixar. There are four films in this series. The woody is the star of many video games, tv shows, books, and many merchandising and promotional items. Woody is sometimes a sarcastic but honorable boy. Bur is a responsible, competent, and passionate boy, making him the most lovable among his fans. Woodpecker can do anything for his near and dear friends, consider them family member, and tries to keep them together. He is a good-hearted hero who is always ready to help others. All these characteristics make him lovable to his fans. Are you ready to learn how to draw a cartoon, Woody? Let us get started!
We will begin our drawing by sketching his face. We will use a long curve line to outline his forehead and chin. Then sing a “C” shape line we will from his ear. He then used a curve line that passed across his ear to create the base of the hat. Use a quarter circle to show the hair on his forehead. Draw a small square and extend an “L” shape line to form his neck.
We will draw a collar of woody’s shirt by using a curved triangular shape on one side and a curved rectangular shape on the other. Then, some wavy lines below the collar draw the woody vest. Then we will draw his arms using triangular shapes on both sides of his belly.
We will sketch a “u” shape line to form his belly. Now moving down, we will draw a pair of parallel lines to create his long and slender legs. Then we will sketch the long shoes he is wearing. Then we will outline an oval shape encompassing the woody’s head to form his round hat. Draw woody’s eyes using circles and a curved line to begin his eyebrows. Now draw his small circles in the eyes to form his eyes pupils and make use of some curved lines to sketch his happy mouth and nose. Our woody drawing is ready for coloring. You can use a reference image as guidance.
Woody Woodpecker Drawing
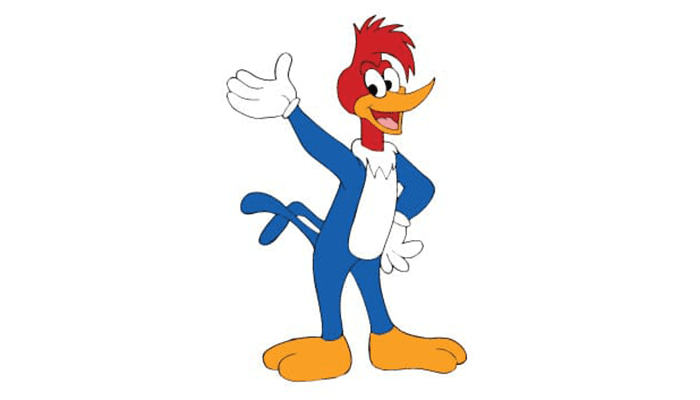
Woody woodpecker is an iconic character of the universal studio. It first appeared in 1940. It is a humanlike woodpecker famous among his fans for his mischievous traits. He remains the best entertainer of the 1950s. He is heroic, calm, and kinder that mostly outsmarts people. Woody woodpecker is among the top 50 cartoons in history. It is very humorous and mischievous. It has remained the star in many comics, animated movies, and video games. There are so many fans of this adorable and calm cartoon character worldwide. Are you ready to learn how to draw a cartoon Woody Woodpecker? Let us get started!
We will begin our woody woodpecker drawing from his face. For this, we draw a circle. Sketch a horizontal curve line near the bottom and a vertical line at the top. Sketch two small vertical lines below the circle to form his neck. Then we will draw a rectangular shape with a curved side to make the belly portion of Woody Woodpecker. Then draw an angled line for the right arm and the left arm.
Then draw a vertical line downwards to form his legs and a circle to make his foot, and repeat the process for the left leg. Now we will draw two curved horizontal lines and connect them at some point to form his beak. Draw a “C” shape to form his cheek on the right side. And at the bottom of the beak, sketch a ‘V” shape line to form a lower beak. Now we will draw two big circles for his eyes and smaller circles to make the pupils in his eyes.
Use a curve line to form his eyebrows. Now we will draw a spike-like shape on his head to form a tuft of hairs. Now draw a short series of curved lines for tufts of neck hairs. And now, using angled lines, we will complete his arm and hand. Draw an extensive “U” shape line to make the torso of Woody Woodpecker. He is using an angled line sketch on his 2nd arm. With small ovals in a circle that we draw for the foot from his fingers, repeat the process for 2nd leg. Then using, overlapping curved lines form his tail. Then erase the extra line that remains to make your drawing clearer. Our Woody Woodpecker drawing is ready for coloring.
Conclusion:
So, that was all from our side for all of your cartoon drawings. All these characters are among the top 50 world’s most famous cartoons. We are hopeful that the cartoon drawing tutorials and steps we discussed will benefit you in how to draw a cartoon.
Just let us know about your valuable feedback in our comment section. So, we will keep creating such an engaging drawing tutorial for you to relax and spend quality time in drawings. Kindly share your drawing with us on our Facebook page and with your friends and family.