Backpack Drawing
Today, we will learn about backpack drawing. Backpacks are an essential accessory. These are used by students and hikers or for belongings for an overseas or local adventure. By Looking at its shape, it seems backpack drawing is easy to draw. But drawing a backpack takes great attention if someone guides you through some easy steps. I will teach you to step by step how to draw backpacks. If you are a beginner, sketching a backpack may be complex. Don’t worry; I will teach you so it will become easy.
Learn some facts about backpacks
The backpacks are famous as School bags, kit bags, knapsacks, book sacks, sack packs, book sacks, rucksacks or backpacks, etc. These are cloth bags with straps for wearing on the shoulders. These backpacks have multiple uses. They are used by students, hikers, military workers, and office people for carrying their laptops. These are also used frequently by travelers and adventurers. They provide ease in carrying their accessories.
5 Useful Tips for Drawing Backpack
A good artist remains very conscious about his drawing. He always wants to create a masterpiece. He takes care of each little thing that can make his work better. So, to become a good artist, you need to be focused and passionate and follow the following tips. These handy tips would be helpful for you for drawing anything, not only backpack drawing.
- Be neat and clean
- Avoid erasing again and again
- Relax, don’t hurry up.
- Always adopt a stepwise approach
- Always be creative
Kit for how to draw Backpack
It would be best if you had a checklist of the things required for backpack drawing. Since this is a simple drawing, you don’t need much but only a few basic things.
- Pencils
- Drawing Sheets
- Sharpener
- Eraser
- Colors
- Black marker (not compulsory)
- The time required for Backpack drawing is easy; it will take only 20 minutes of full attention.
5 Simple Steps for Backpack Drawing
Let’s get started! Draw a school bag or Backpack. So finally, it’s time to draw! I will tell you the simple steps of Backpack drawings that you must follow strictly.
Step 1:
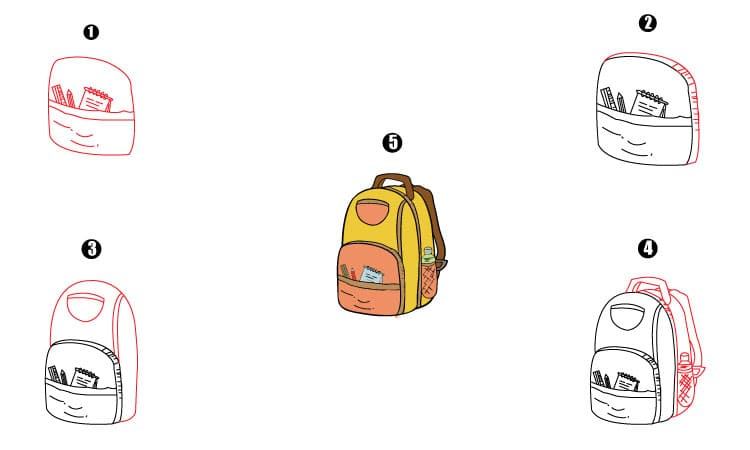
We will begin our backpack drawing by sketching the curve lines. We will outline a short horizontal curve line. Then we will draw a long arching line over the existing line. It will form the top front pocket of a backpack. You can use reference images as a guiding source. We will draw school supplies to draw a rectangular shape for the notebook and a few circles to show the notebook’s spiral binding. Next to the notebook, draw a rectangular shape ruler finely sharpened pencil. Then we will erase extra lines and processes to keep our drawing neat and clean.
Step 2:
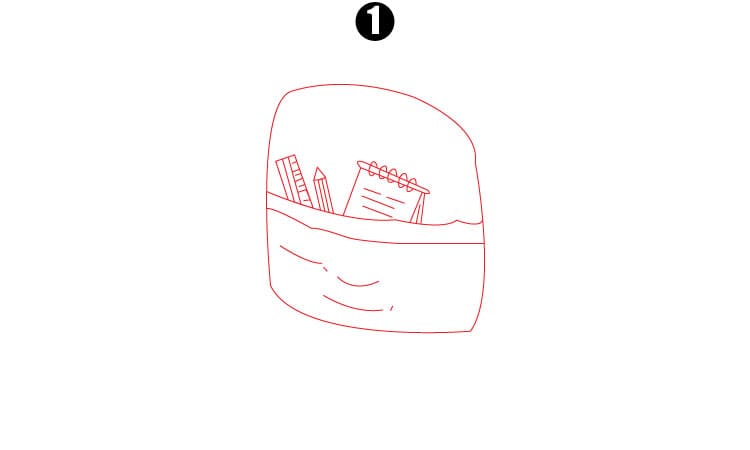
In this 2nd step, we will draw an extra curved line behind the forefront pocket to show a bulging pocket filled with school supplies.
Step 3:
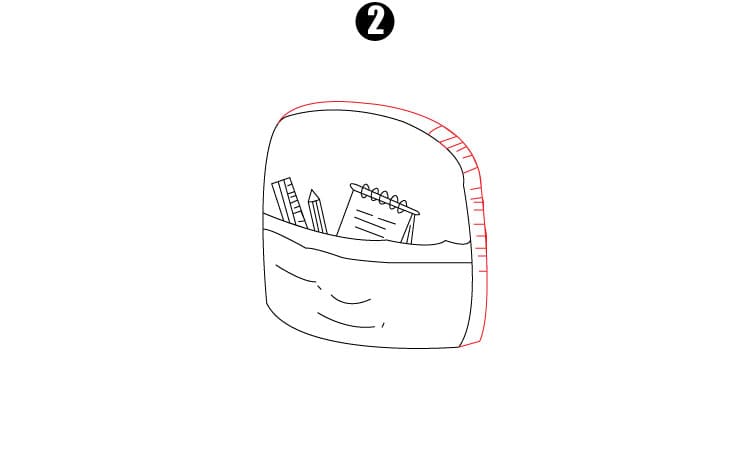
In 3rd step, we will draw the central portion of the Backpack by sketching curve lines and connecting them to the already drawn part of the Backpack. You can take help from a reference image.
Step 4:
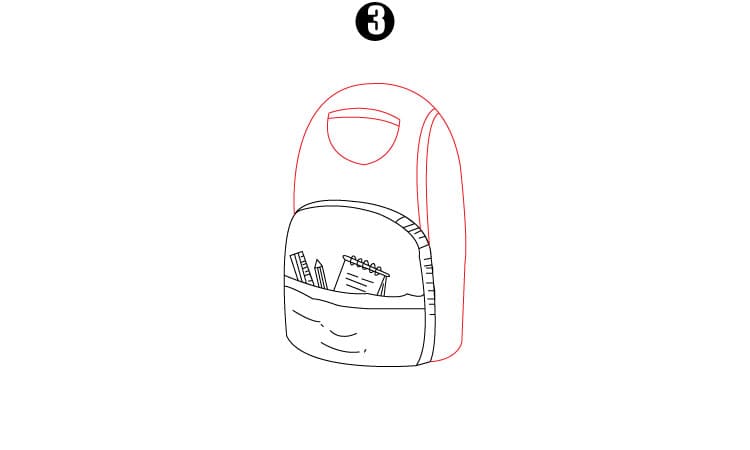
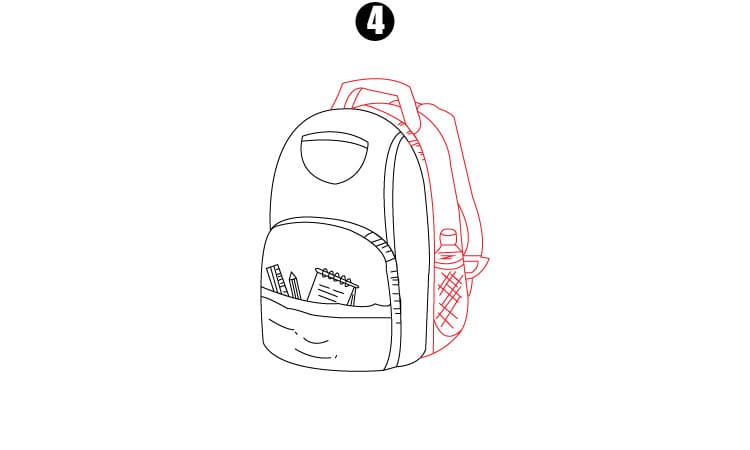
In this 4th step, we will draw the main pocket of a backpack by drawing a curve line and sketching it backward. Now draw an irregular curve line at the top of a bag to make a handle. Now we will outline the shoulder straps using two paired curved lines. Draw a “u” shape with curved lines to make the side pocket of a backpack.
Step 5:
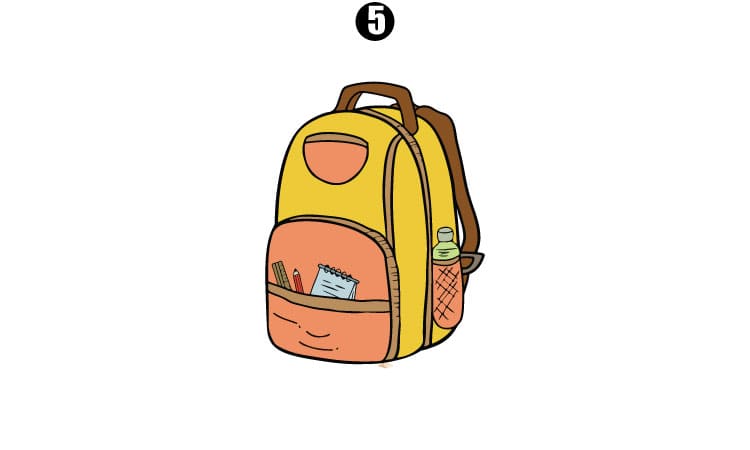
In this step, our beautiful backpack drawing is complete and ready to color in it. Your kids can use bright and cheerful colors to make this adorable and magnificent to their collection book.
Final Words:
So, I hope it was fun for you to go through this guide. Now you are very well aware of Backpack drawing. Now it’s totally up to you how much effort you put into the sheet. Using colors, art mediums, and extra details will enhance your drawing expertise. Drawing is an engaging and quality time-spending activity. So, keep drawing your pages and visiting our website for easy drawing guidelines.
You May Also Like:


